10 Lightroom Classic and Lightroom Tips
This year is quickly coming to a close and I wanted to leave a series of my favorite tips for Lightroom Classic and Lightroom to help you end on a good note or start next year off on the right foot. Heck, why not both! Please feel free to share any tips of your own in the comments.
Configure your default catalog
One of the most important ways of ensuring you’re opening the correct catalog each time you launch Lightroom Classic is to configure a specific catalog as the Default Catalog. Go to Lightroom Classic > Preferences > General (PC: Edit > Preferences > General) and click the Default Catalog drop-down menu to choose the catalog file that is currently open and set that as the default. From that point forward you can rest assured that each time you launch Lightroom Classic that catalog will open regardless of what catalog you previously had open.
Create an import preset
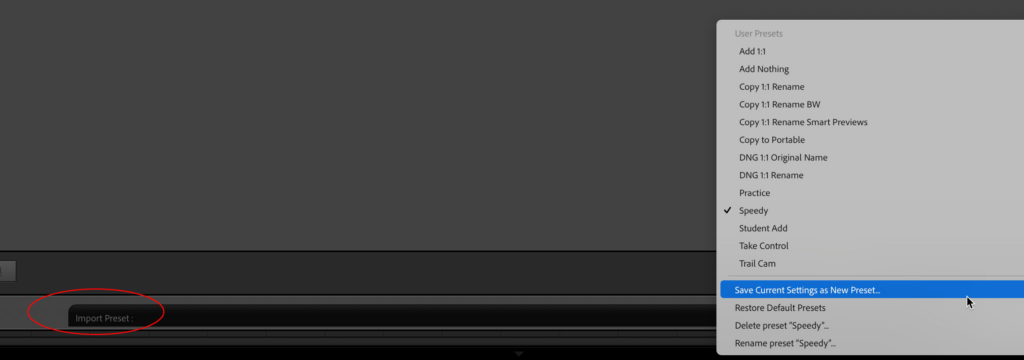
A huge time saver and important method for keeping your import process consistent and efficient is to save all the common settings of the Import dialog as a preset. On your next typical import, configure all general settings as desired (excluding any settings that are too specific, like keywords or collection membership), and then click the Import Preset drop-down menu and choose Save Current Settings as New Preset. Give the preset a meaningful name when prompted and click Create. The next time you import a new batch of photos just confirm your preset is selected (or select it yourself) and know all your core settings are ready to go.
Master zooming in Library and Develop
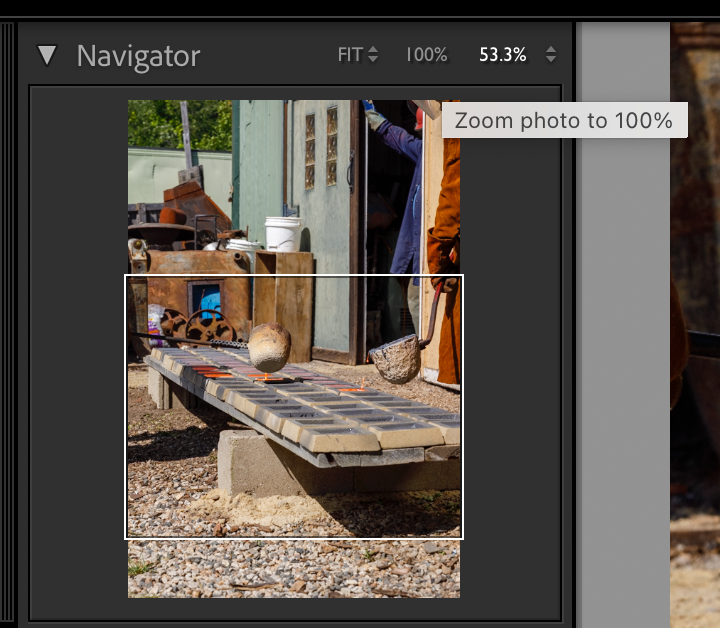
Some time ago Lightroom Classic got an update that changed some of the zoom functionality for the better. The first thing to note is that it replaced the old zoom ratios (1:1) with zoom percentages that I think are easier for people to understand. Additionally, it added a 100% button above the Navigator panel to make it easy to quickly jump to that zoom level as needed. You can still access a range of zoom levels, from 6% to 1600% from the drop-down menu at the top of the Navigator. We also gained two new ways to zoom; Box Zoom and Scrubby Zoom. Box Zoom works in both the Library (Loupe view) and Develop modules by holding the CMD key (PC: Ctrl) while dragging a rectangle (box) the size you want to zoom into. Scrubby Zoom only works in Develop (with GPU acceleration enabled), and involves holding the Shift key while dragging left to zoom out or right to zoom in. Give them a try!
Mark folders and collections as favorite sources
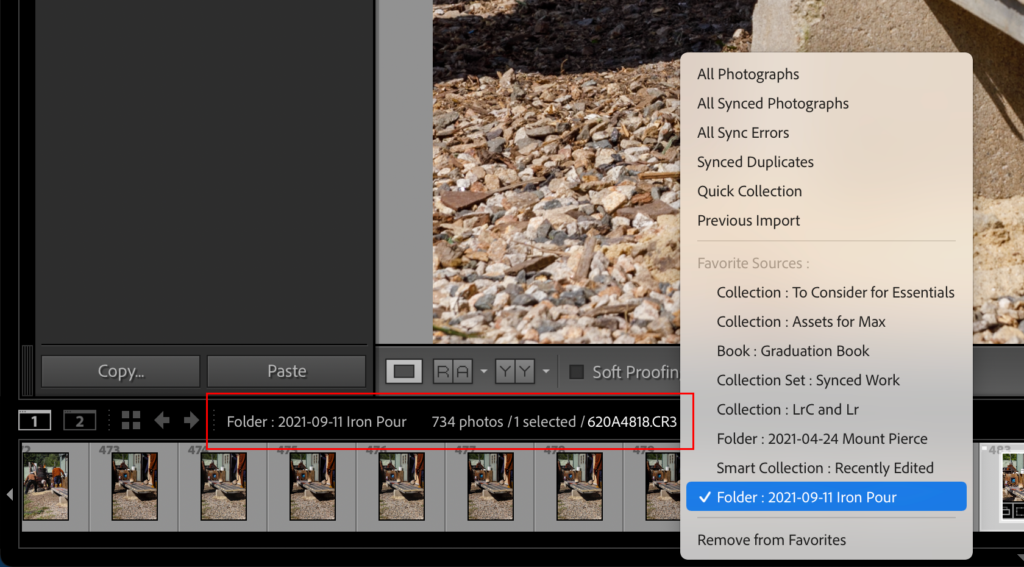
If you have folders that you want to access quickly from anywhere in Lightroom Classic, you can mark them as a favorite. Simply right click any folder in the Folders panel and choose Mark Favorite from the contextual menu that appears. This adds a star icon to that folder and adds the folder to the Favorite Sources list accessible from the Filmstrip panel in any module. You can add a collection or even collection set to the Favorite Sources list by first selecting it in the Collections panel, then click the breadcrumbs menu in the Filmstrip and choose Add to Favorites at the bottom of the list (you can remove sources from the list the same way).
Mark most used presets and profiles as favorites
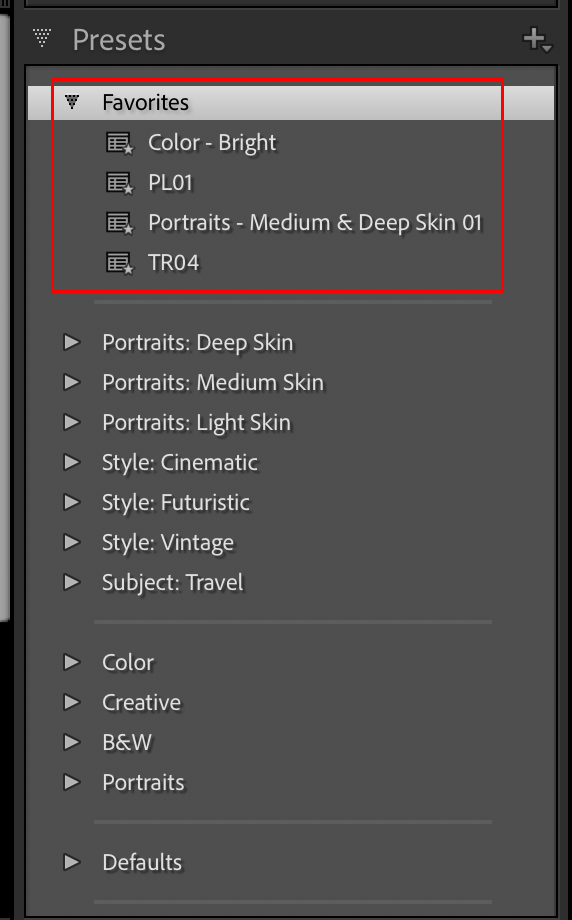
A quick way to gather your most used Develop presets into one group is to mark them as a favorite. Simply right click a preset and choose Add to Favorites from the contextual menu. That preset will be added to a special Favorites group at the top of the Preset panel.
Similarly, you can open the Profile Browser in the Basic panel, scroll through profile groups, and click the star icon that appears in the upper-right corner of each profile to mark it as a favorite. Favorite profiles will conveniently appear in the Profile drop-down menu in the Basic panel for easy access.
Manage the Presets panel
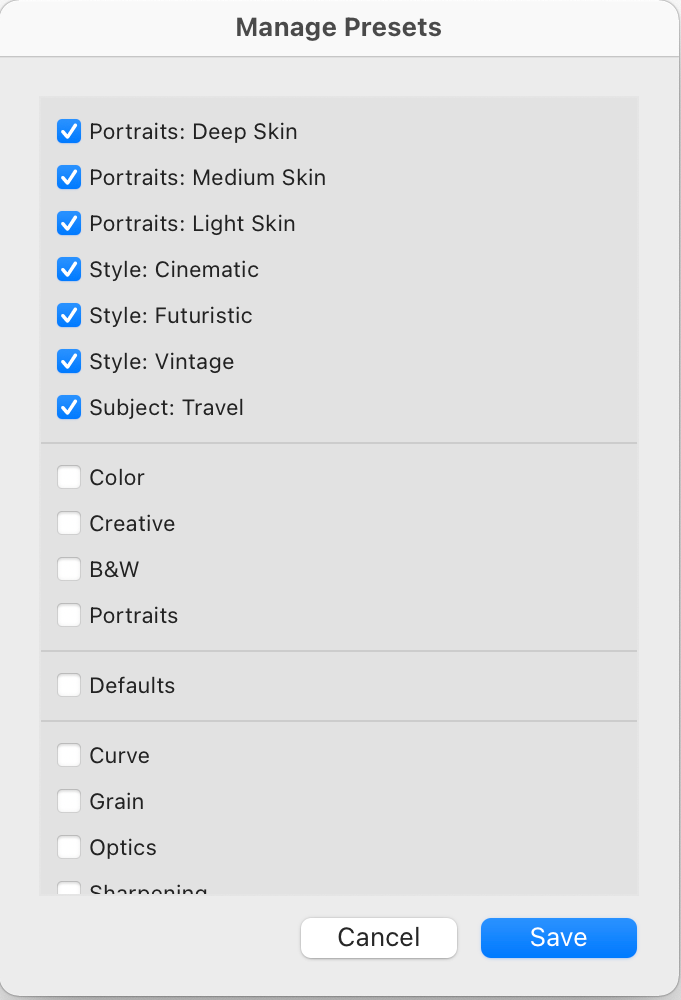
Lightroom Classic comes pre-installed with many Develop presets, in various groups, within the Preset panel. Some are good, some are not, but once you’ve explored them and possibly marked some as favorites (see previous tip) you can hide any preset groups in the panel you no longer need to see (presets marked as favorites will still be visible in the Favorites group even if you hide its parent preset group). Click the + sign at the top of the Presets panel and choose Manage Presets to open the Manage Presets dialog box. From there, simply uncheck any preset groups you no longer want to see in the Presets panel and click Save. You can always go back to this dialog box and restore any hidden groups.
Sync LrC catalog to Lr
To expand your Lightroom Classic catalog to your mobile devices it all starts with syncing your catalog. Click the cloud icon in the upper-right corner of the interface and click Start to begin the process. I’ve got an entire article if you want to learn more.
Explore Auto Adding photos in Lightroom for mobile
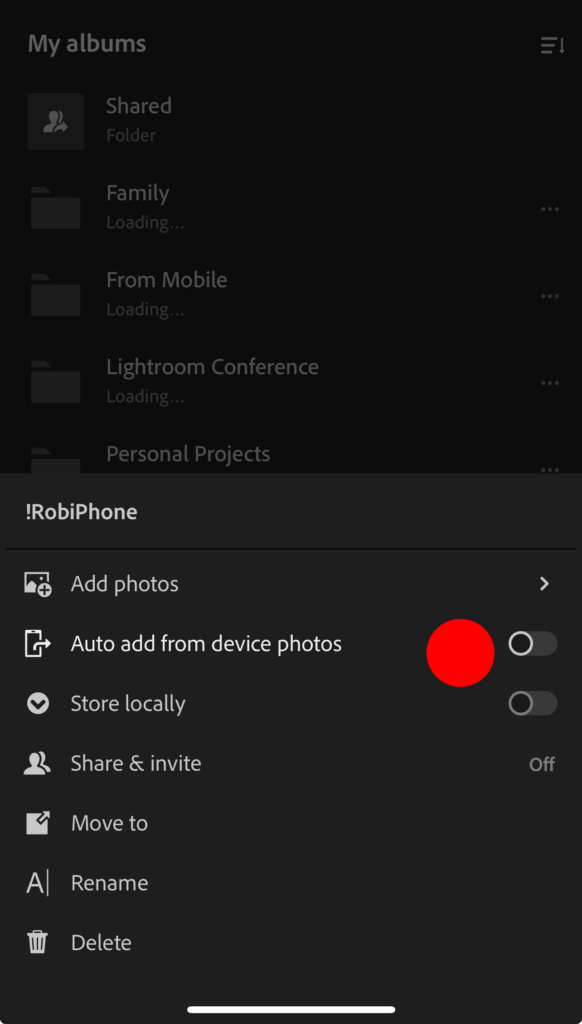
I like to use the Lightroom app on my iPhone to transfer photos taken on that device to my Lightroom Classic library. I have the Photography plan with 1TB of storage, so I don’t worry about filling up the cloud storage, and I like that this can be automated. If you only have the 20GB storage plan, use this tip with caution (or not at all). To set up Auto Add, tap the 3-dot menu next to the album you want to add the photos to automatically and toggle the Auto add from device photos to the on position. From that point on any newly add photos to your device’s camera roll will automatically import into Lr. You can disable by toggling that same switch to the off position. This will not automatically add photos previously sitting on your camera roll.
Access the Lightroom camera faster
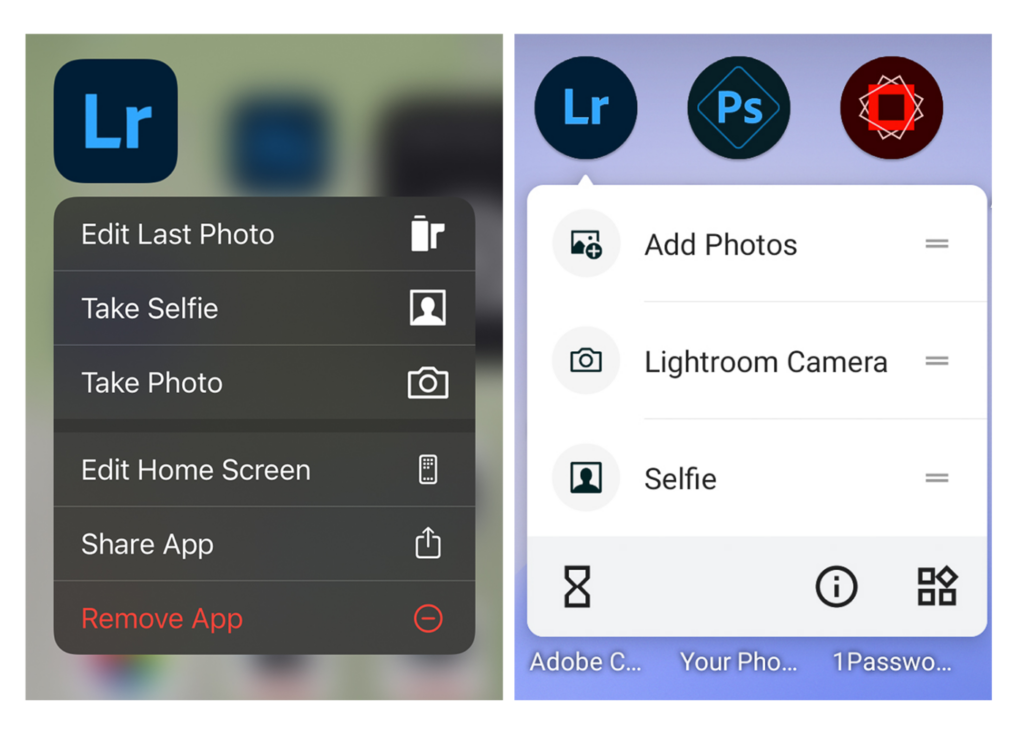
I love the camera module within the Lr app on my phone and shoot with it a lot. On iOS (version 9 or later) you can jump right to the camera by doing a long press on the Lr icon to access a contextual menu containing an option for Take Photo or Take Selfie to choose the back or front facing camera respectively. On Android (version 7.1.1 or later) the process is similar. Locate the Lr icon on your home screen and give it a long press to access the Lightroom Camera app shortcut.
Set a Target Collection or Album
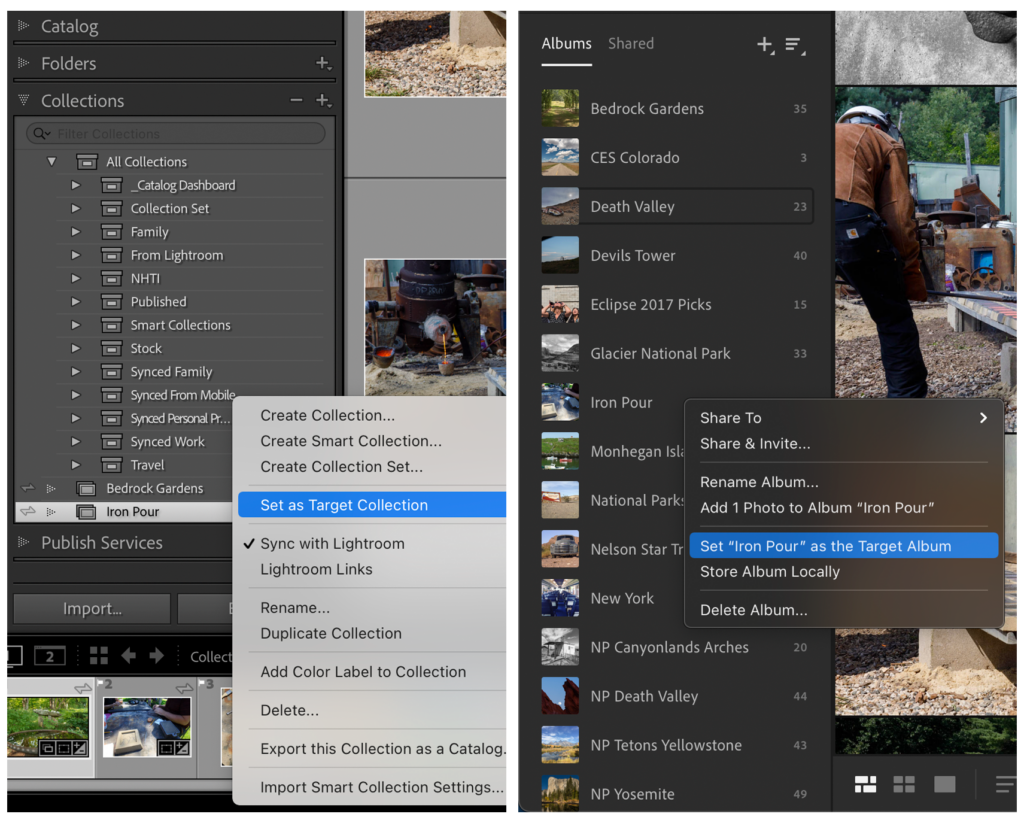
A fast way to add photos to a collection in Lightroom Classic or album in Lightroom is to designate a collection or album as the Target. In Lightroom Classic, right-click any regular collection and choose Set as Target Collection from the contextual menu. From that point on, you can select any photo (or group of photos in Grid view) and press the B key to add the selection to the Target Collection. In the Lightroom for desktop app, right-click the desired album and choose Set “[album name]” as the Target Album from the contextual menu. In this app, the T key is the shortcut to add selected photos to that album.

Adding some personal details and questions about Geometry Dash World might make it more appealing to other Lightroom users.