Create This Cool Multi-Photo Layout In Lightroom in Two Minutes
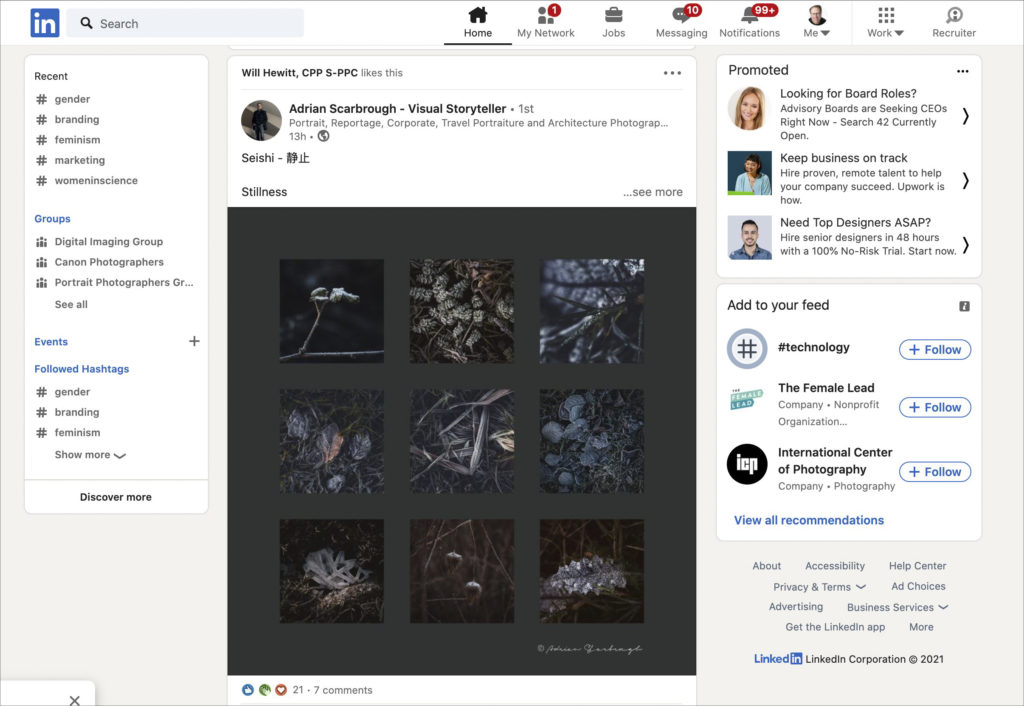
I saw this layout (and the wonderful photos within it from photographer Adrian Scarbrough), in my LinkedIn feed (seen above), so I thought it might be helpful to show how to make a similar layout for your own images in Lightroom Classic (Lightroom cloud doesn’t have a printing feature). Anyway, it’s like I said: two minutes start to finish. Three minutes, tops.
Here we go:
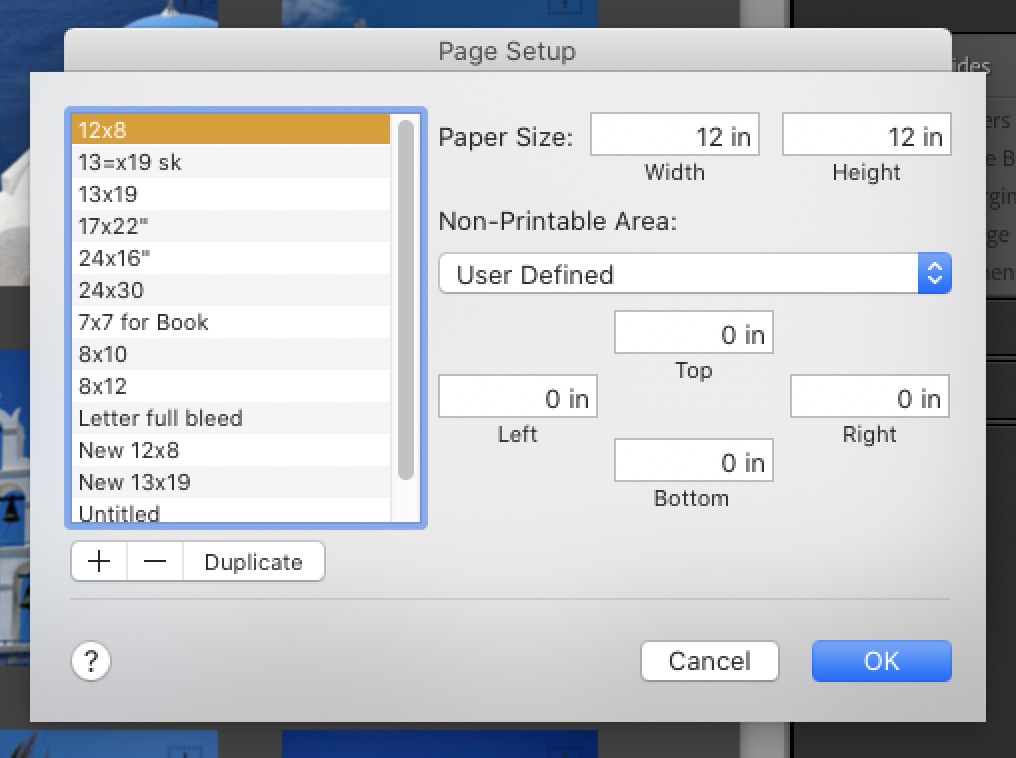
STEP ONE: In the example we saw above, it was a square page size, so if you want that, you’ll need to create a custom page size, so click on the Page Setup button, and in the Page Setup window, from the Paper Size pop-up menu, choose ‘Manage Custom Sizes’ and then type in your desired size (in my case 12″ x 12″ and I set the borders to 0-inches all the way around, as seen above).
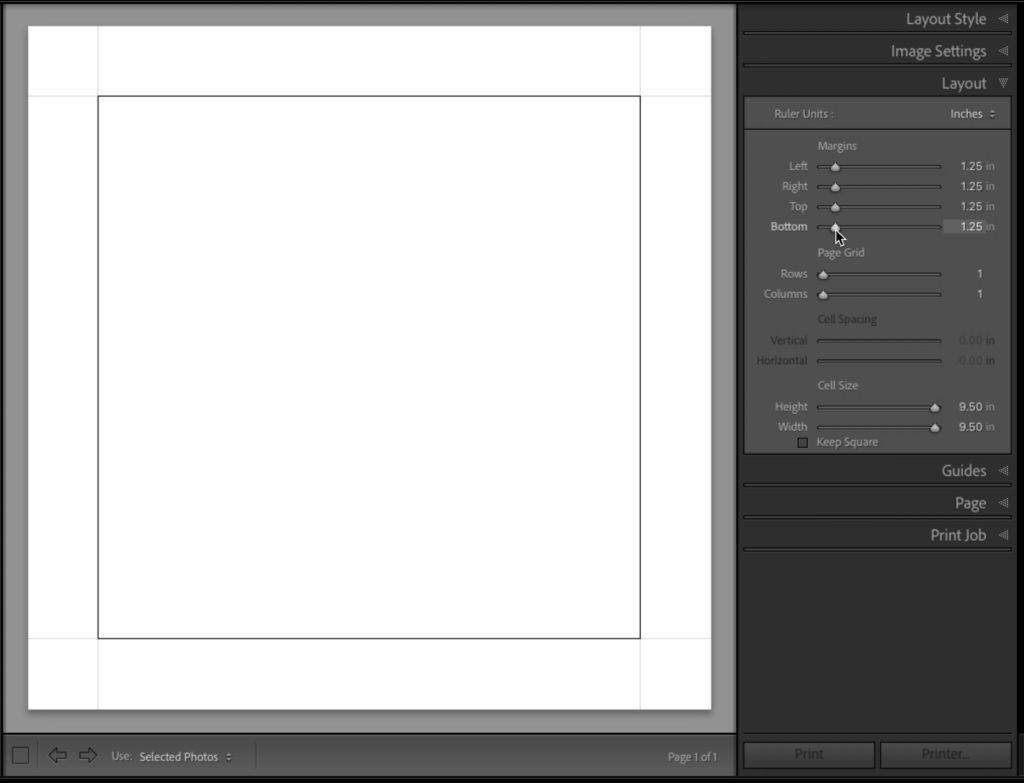
STEP TWO: In this layout, there was around a 1.25″ margin on all sides, so go to the Layout panel and drag your Margin sliders to 1.25″ (as seen above).
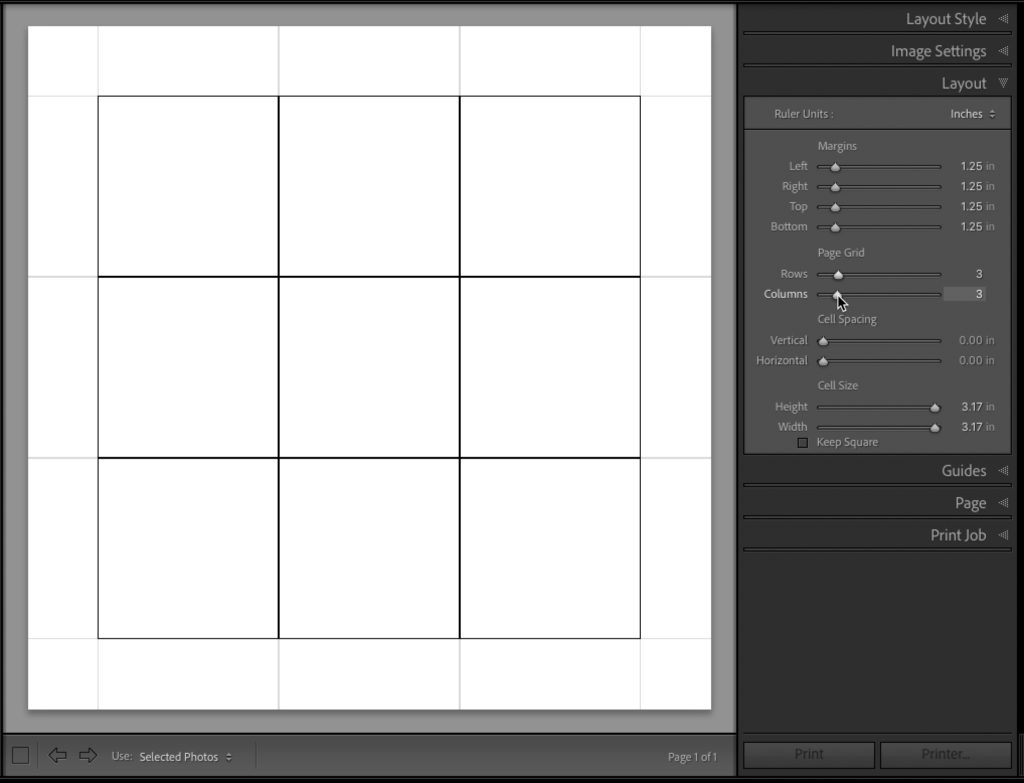
STEP THREE: Now, to create the nine cells for the images, in that panel go to the Page Grid sliders and drag them to 3 Rows and 3 Columns (as seen above) and it adds 9 cells like you see here.
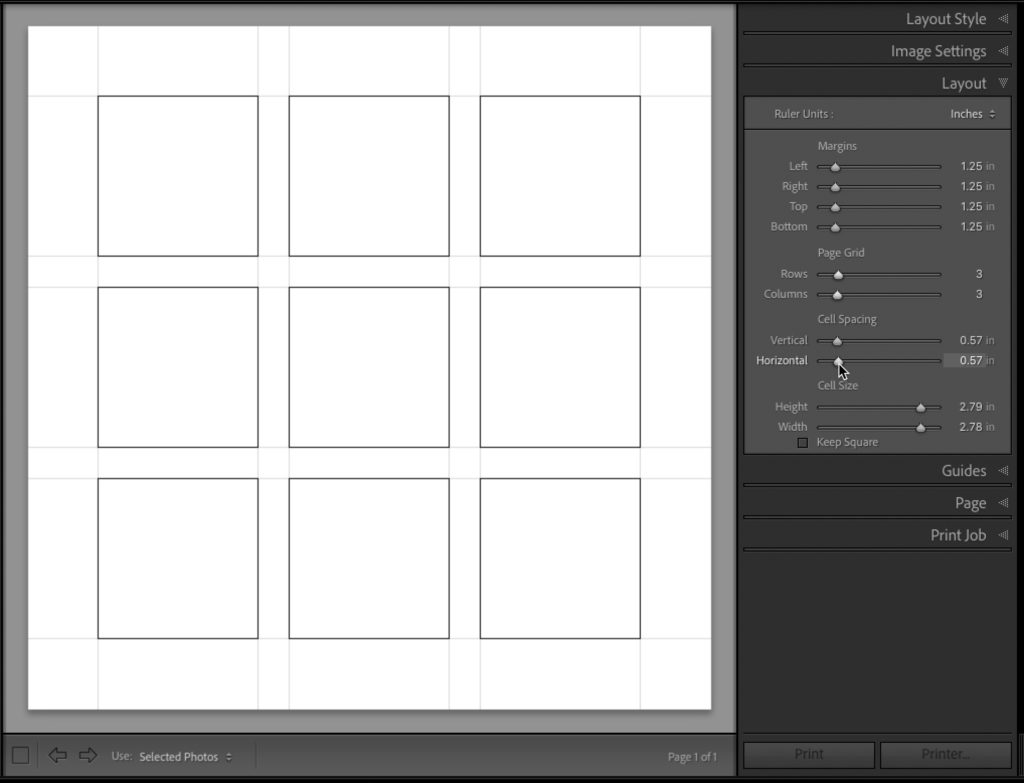
STEP FOUR: To add some space between the images, use the Cell Spacing sliders (as I did here, dragging them both to 0.57 to leave a nice gap between them as seen above).
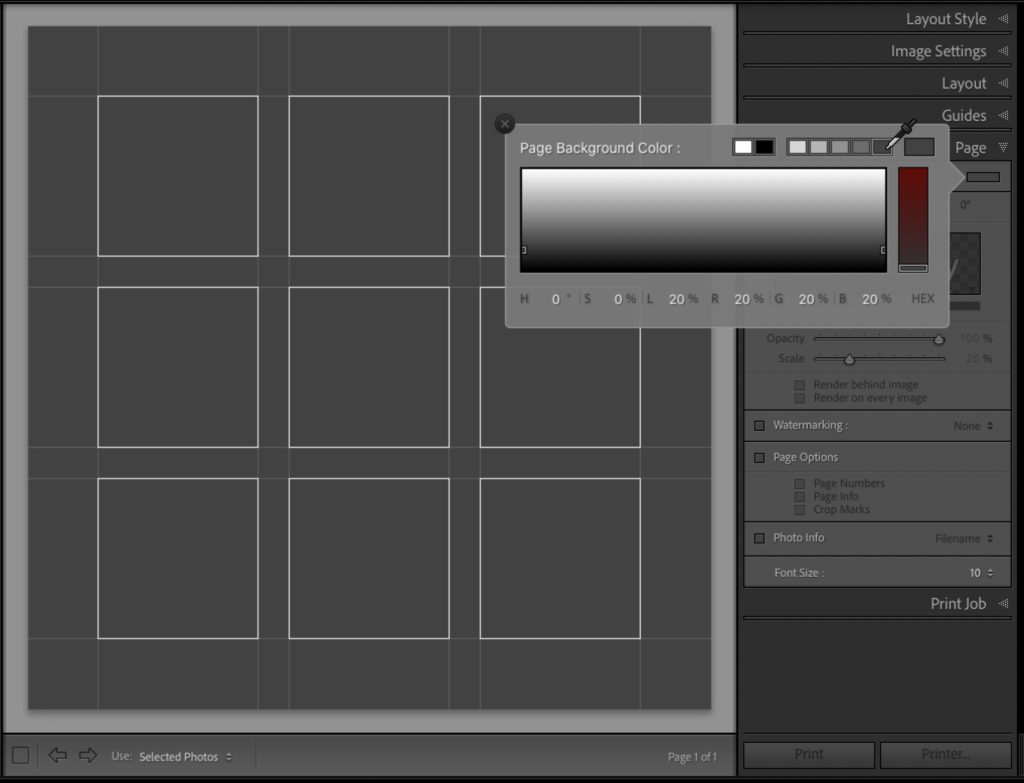
STEP FIVE: Now that our photo grid is set up, to make the page background that nice dark gray, go to the Page panel; click on the Background Color checkbox (it’s near the top of the panel), and then click on the little color white color swatch to the right of it, the Page Background Color picker you see above appears. Click on the dark gray background to make that your background color.
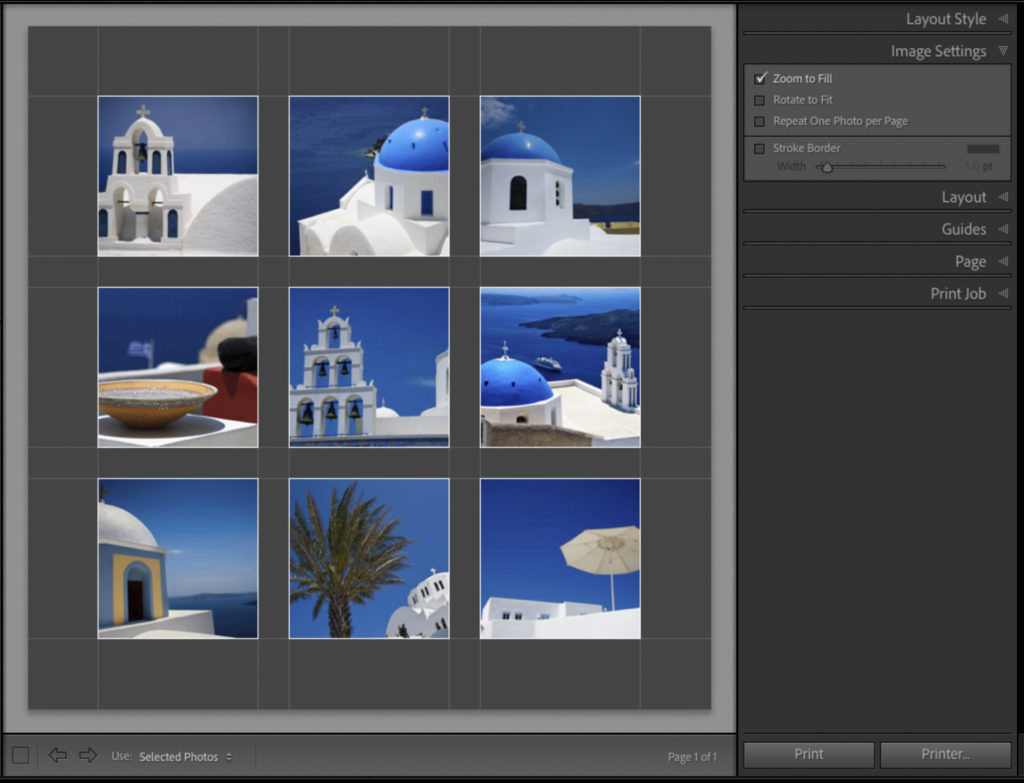
STEP SIX: Now select the images you want to appear in your cells (just select them down in the Filmstrip, or in a collection, etc.) and they populate those cells (as seen here). Make sure the Zoom to Fill checkbox is turned on (in the Image Settings panel), and make sure “Rotate to Fit” is turned OFF, and you’ll have the look you see above.
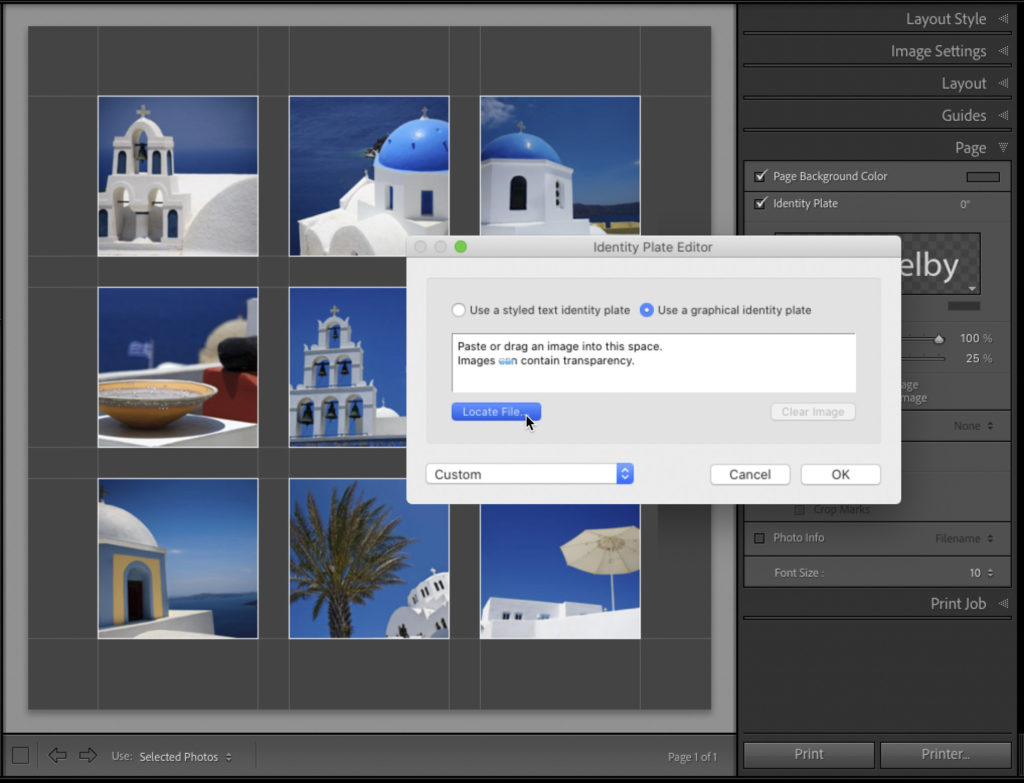
STEP SEVEN: Go to the Page panel; turn on the Identity Plate checkbox, and then in the corner of the Identity Plate preview, click the white down-facing arrow to bring up a pop-up menu; then choose ‘Edit’ from that pop-up menu to bring up the Identity Plate Editor window (seen above). Click on the “Use a graphical identity plate’ button at the top right, and then click the Locate File to choose your logo, or graphic, etc.. The background will need to be transparent behind your logo or signature (in our case), so the image you’re importing will need to be a file save in .PNG format, so it maintains that transparency when you bring it into Lightroom.
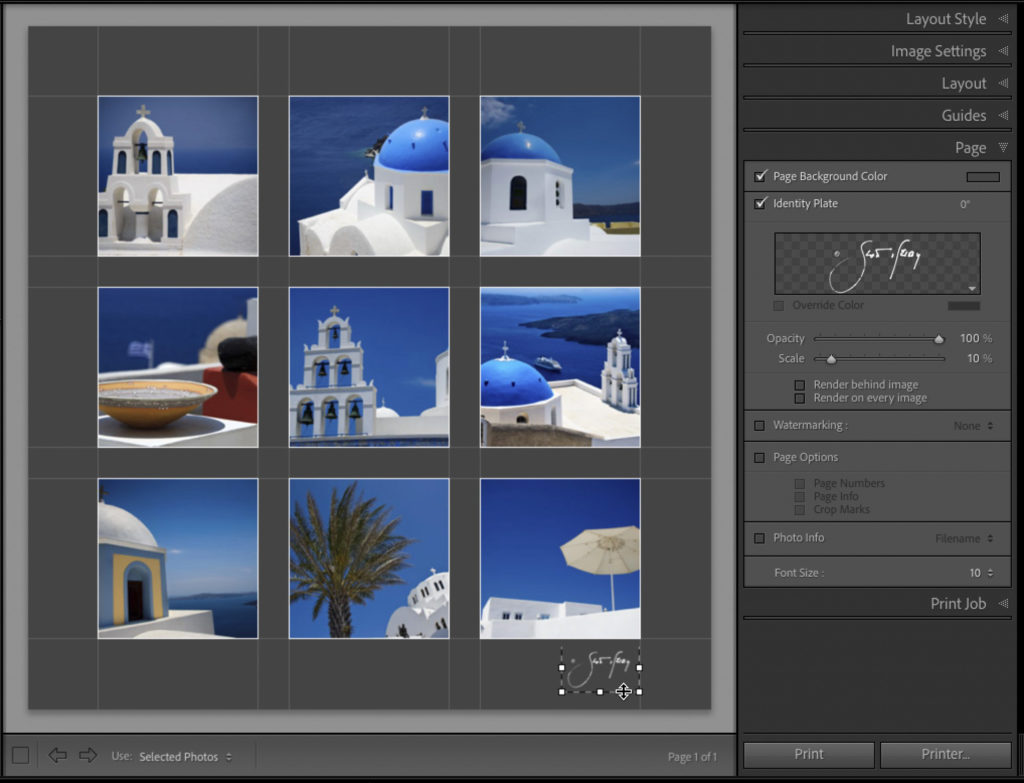
STEP EIGHT: Your image will appear in the center of your screen – click and drag it to where you want it (in this case, under the bottom right corner).
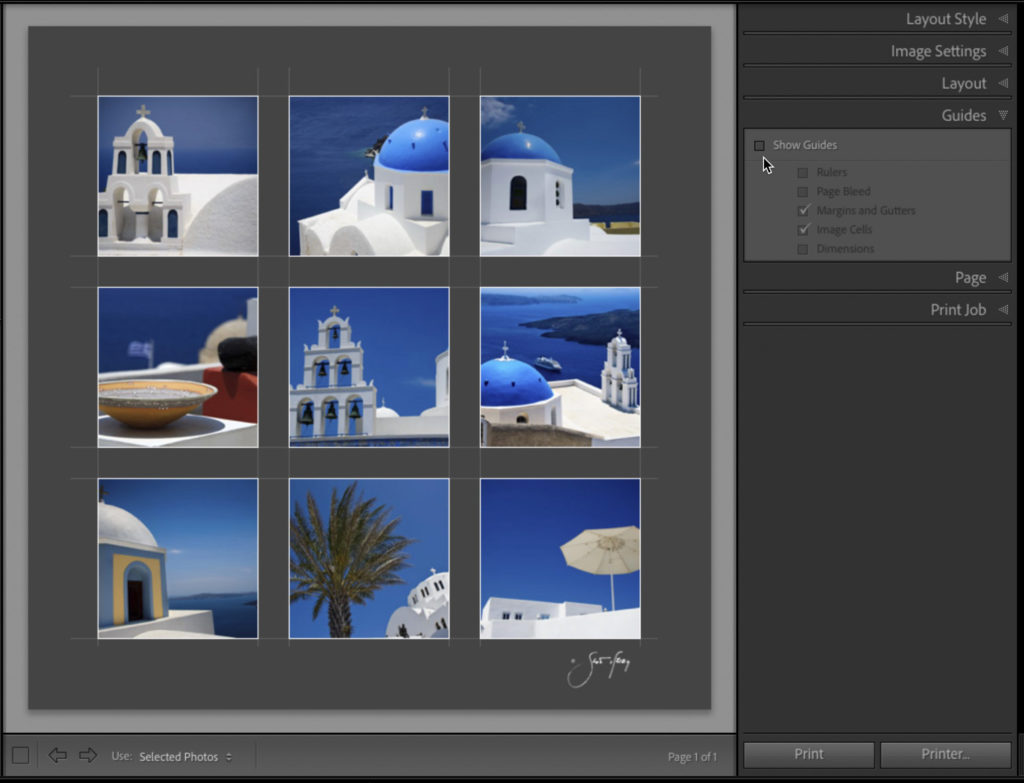
Here’s how the image will look once you turn off the “Show Guides” checkbox in the Guides panel. You can Save it this page as a JPEG so you can share it on social media. You do that at the top right corner of the Print Job panel. Where is says “Print to…” choose JPEG image. That’s all there is to it.
One last thing: So you don’t have to built this layout again, go over the Template panel and save this as a new Template (click on the + sign to name it and Save it).
Hope you found that helpful! Have a great weekend, everybody!
-Scott
P.S. I shared some “Scott Stuff” over on my other blog, including how I won a big photography contest, which totally caught me off guard. Here’s the link if you’ve got a sec.


Wow! Such a great looking layout. I’m going to have to give this a try 🙂
When I open Page Setup I get Print Setup!!!! Any idea what is going on?
Hi Regina,
I suspect you are on Windows? Since this layout is just going to be saved out as a JPG, try this:
in the Print Job panel, change the Print To option to JPEG File, then an option appears in that same panel called Custom File Dimensions. Check the Custom File Dimensions box to enable it, then enter 12 x 12 for the size. Then follow the rest of Scott’s tutorial.
This way you can avoid setting up a custom print size because you won’t involve the printer at all.
[…] post Create This Cool Multi-Photo Layout In Lightroom in Two Minutes appeared first on Lightroom Killer […]
Back at you with a mea culpa. I see that it all works once you choose /Contact Sheet as the VERY 1st thing to do…..then all the rest follows. Always good to start at the start.
I was hoping to save the resulting 9 shot collection as a sole jpeg to sendoff to PosterJack bugs I see that is not possible. Too bad, so sad.
Thanks.
Hi Ron,
You can save it all as a single JPG. Scott explains how to do that at the very end of the tutorial (after the last image).
Very disappointing. I am using iMac Catalina with newest LRC version. Appears you are using outdated version of LRC. The instructions you have provided DO NOT work on the newest version of LRC. Too bad, was looking forward to completing this project.
Hi, Ron. I am using the very latest version of Lightroom Classic, on an iMac running Catalina as well. As you sure you launched Classic?
Cool tip! 2 minutes 17 seconds. Done and done. Thanks, Scott!
[…] в исходном месте, вы можете перейти по ссылке ниже: https://lightroomkillertips.com/create-this-cool-multi-photo-layout-in-lightroom-in-two-minutes/и если вы хотите удалить эту статью с нашего сайта, […]
Scott, I can’t even do the first step because you say: “create a custom page size, so click on the Page Setup button, and in the Page Setup window, from the Paper Size pop-up menu, choose ‘Manage Custom Sizes’ ” but I cannot find “page setup’ button anywhere at all. I can go down to the Print Job section on the right and put in “custom file dimensions’ but for a Page Setup window, there simply is not one in Lightroom Classic. I’ve made something similar in the past but never have I had a separate Page Setup button. Thank goodness for the “Custom File Dimensions” under Print Job. Is there a trick in finding it that I don’t know about?
Hi Diane,
I suspect you are on Windows? That’s why the custom print size dialog is different. Since this is just going to be saved out as a JPG your alternative is the way to go. For anyone else needing it, in the Print Job panel, change the Print To option to JPEG File, then an option appears in that same panel called Custom File Dimensions. Check the Custom File Dimensions box to enable it, then enter 12 x 12 for the size. Then follow the rest of Scott’s tutorial.
Once again – Rob for the win. I didn’t realize that difference. I’ve got to get a Windows machine (wink). Thanks, Rob.
Happy to help! 🙂
The Custom File Dimensions option works the same on both platforms, so showing it that way will save you from having to get a Windows machine. 😀