Custom Sort Order in Lightroom Classic and Cloud-based Lightroom
Questions about custom sort orders in collections, folders, and albums seem to be a theme this week on the KelbyOne Help Desk, so I thought I’d tackle it in a blog post to send to people in the future.
Creating a Custom Sort Order in Lightroom Classic
This one has been around for a long while, so I figure it is a good place to start. The first thing to know about creating a custom sort order in Lightroom Classic is that you need to be in either a folder or a regular collection. You cannot create a custom sort order if you are viewing an entire collection set, a parent folder that is also displaying the contents of its subfolders, or smart collections.
While it is possible to drag and drop photos into a custom order using the Filmstrip I find it much simpler to do while viewing photos in Grid view of the Library module, so press G to jump to Grid. From there, simply click and drag a photo into the desired position in the sort, and release when you see the target space highlight (as shown below).

Creating a Custom Sort Order in the cloud-based Lightroom on mobile
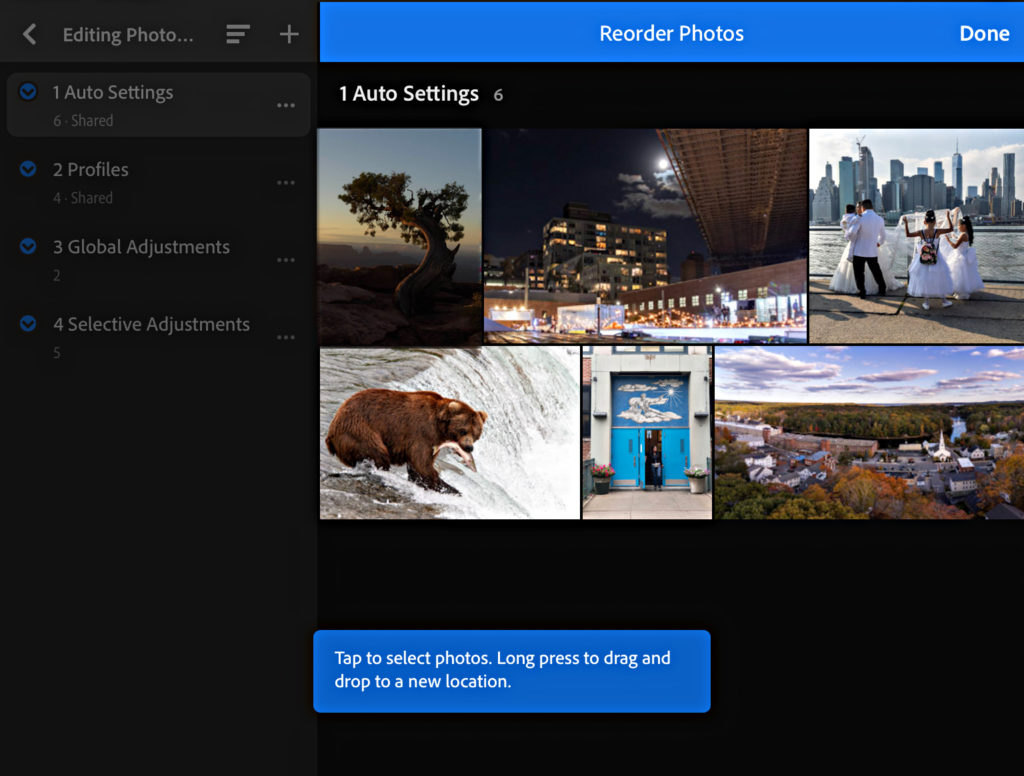
Using Lightroom on a mobile device it is possible to view the custom sort order created in Lightroom Classic in a synced album (collection), or you can create a new custom sort order. Here’s how to create a custom sort order:
- Tap the three-dot icon in the upper-right corner and choose Sort by to open the Sort By panel.
- In the Sort By panel, tap Edit next to Custom (just tap Custom to see the pre-existing custom sort order).
- Long-press the photo you want to move into a new position, and then drag and drop it when you see the blue highlight at the target destination.
- Tap Done when finished to accept your changes.

It is a little finicky, but you can single-tap multiple photos to select them, then long-press one of them to drag the selected photos to a new location.
Creating a Custom Sort Order in the cloud-based Lightroom on Mac/Win
You can’t (yet).
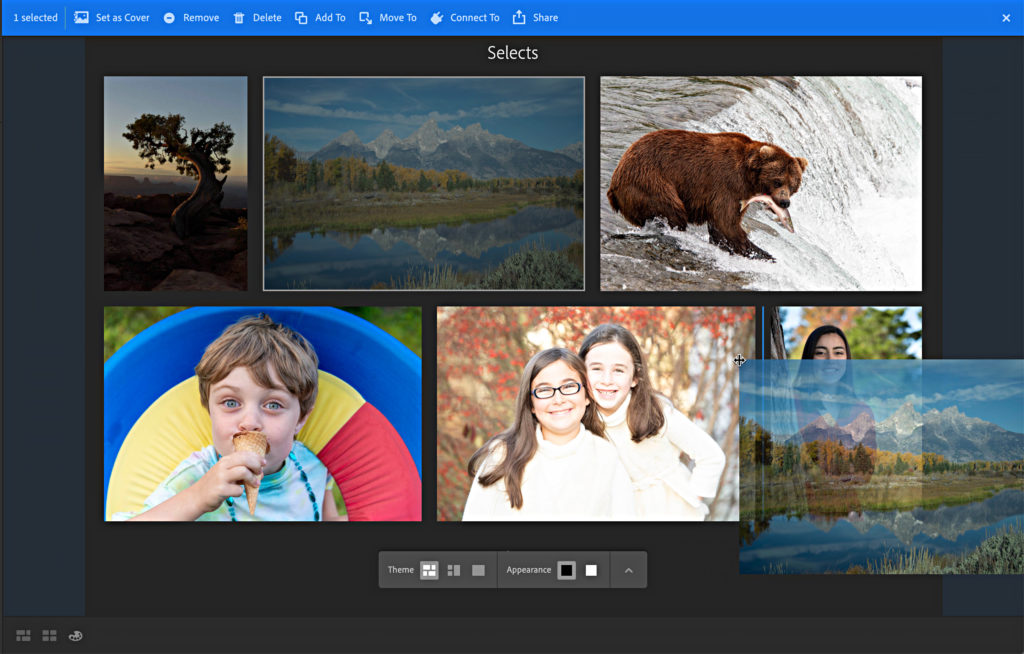
I know, it is surprising, but hopefully this will be added soon. Until then, you can sort on mobile and choose to view the custom sort on Mac/Win. Additionally, you can jump over to lightroom.adobe.com (log in with your Adobe ID) and create a custom sort order there that will also sync with the other cloud apps. Here’s how:
- Select the album you want to sort to view its contents.
- Tap the Display icon (looks like an artist’s palette) at the bottom of the window.
- Check the box on the photo thumbnail you want to move to select it.
- Drag and drop it in the desired location when you see the blue highlight appear.
- Tap either of the photo grid icons (next to the Display icon) to return to the thumbnail grid.
- Refresh your browser to see the new sort order (make sure Custom is selected for sort order via the control to the right of the Display icon).

Hopefully custom sort order functionality will be added to Lightroom on Mac/Win soon. Feel free to add your voice to the feature request.


it’s not surprising that I cant sort the photos in an album, it’s a deal killer!
[…] post Custom Sort Order in Lightroom Classic and Cloud-based Lightroom appeared first on Lightroom Killer […]
Here’s a quick tip to easily move an image outside the displayed range of photos. Of course you can always drag towards the edges of the windows and let it scroll, but that can be tedious and slow.
1. select the image(s) you want to move.
2. scroll to the TARGET position – where you want to move these photos to
3. add the image that’s next to the target position to your selection (command-click on Mac, control-click on Windows)
4. grab this photo and drag it just a bit, until the black vertical line appears to show where you’ll be dropping.
5. let go the mouse button and voilà, all selected photos will go right there.
Thanks, Thomas!