
Starting Over from Scratch in Classic: Part 2
This is a continuing discussion that started last week. Be sure to check out Part 1 for context.
Preparations
Knowing what is at stake (last week’s post), let’s go through the things you should do before you start over. First, have a good backup of your catalog and of your photos. This is critical. You want the worst thing that can happen to be that you are right back where you started. This will give you some piece of mind, and the freedom to roll up your sleeves and get it done.
Next, you’ll want to try to resolve all (or as many as possible) instances of offline/missing files from your catalog. The reason for this is that Lightroom can’t write from the catalog to each photo’s XMP metadata if Lightroom can’t find/access the photo. If Lightroom can’t write to the photo’s XMP metadata, then you will lose all data about that photo stored in the catalog. I’ve written an article that details all of the ways to reconnect those missing/offline photos for anyone that needs help there.
The whole point of this exercise is to have Lightroom write from the catalog to all photos so that when you re-import them into a new catalog later you will preserve as much of the work you have done previously in Lightroom as possible.
OK, now that all missing/offline files have been resolved, it is time to decide what you want to do about the things that can’t be written to XMP metadata (again, see last week’s post on that). I’ll also show you the steps you can take if you want to try to convert some of those things to a data point that can be written to XMP.
Note, you don’t have to do all the things I’m about to describe, only the ones that matter to you and your workflow. For instance, if you never used Flags, just skip that part.
Flags
If you use Flags and you want to preserve those in your new catalog you can manually convert those flags to Star Ratings. If you currently use Star Ratings as part of your workflow, then you could apply a Color Label in place of a flag instead. Basically, all you are doing is filtering all photos by Pick Flag status in Grid view, then selecting all flagged photos, and then applying a Star Rating (or Color Label if that works better) that represents the Pick Flag for this purpose. Later, when you import the photos into the new catalog you could even convert them back to Flags if you wished.
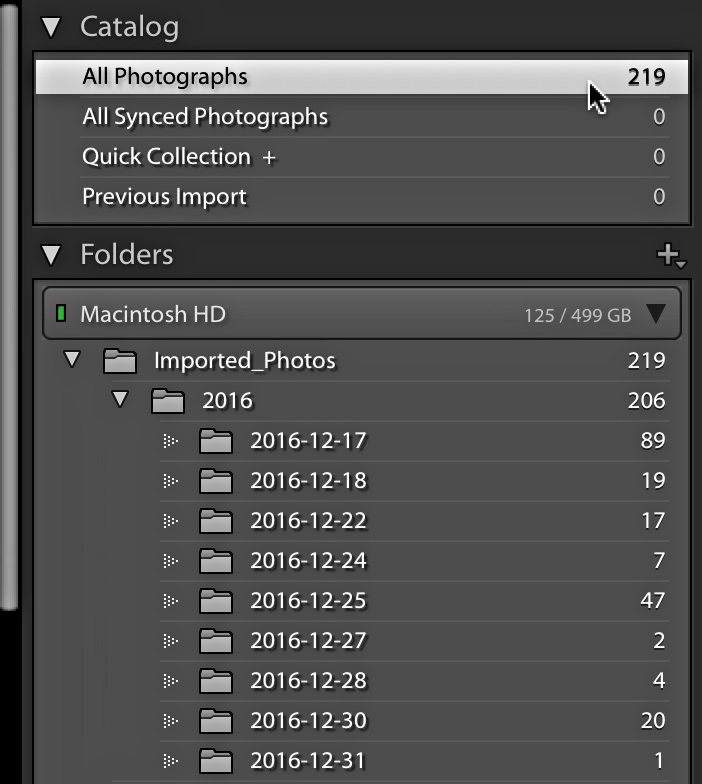
STEP ONE: Press G to jump to Grid view, and click All Photographs in the Catalog panel.
STEP TWO: Click the Attribute button on the Library Filter bar, and then click the Pick Flag icon (white flag) to show only photos with a Pick Flag applied.
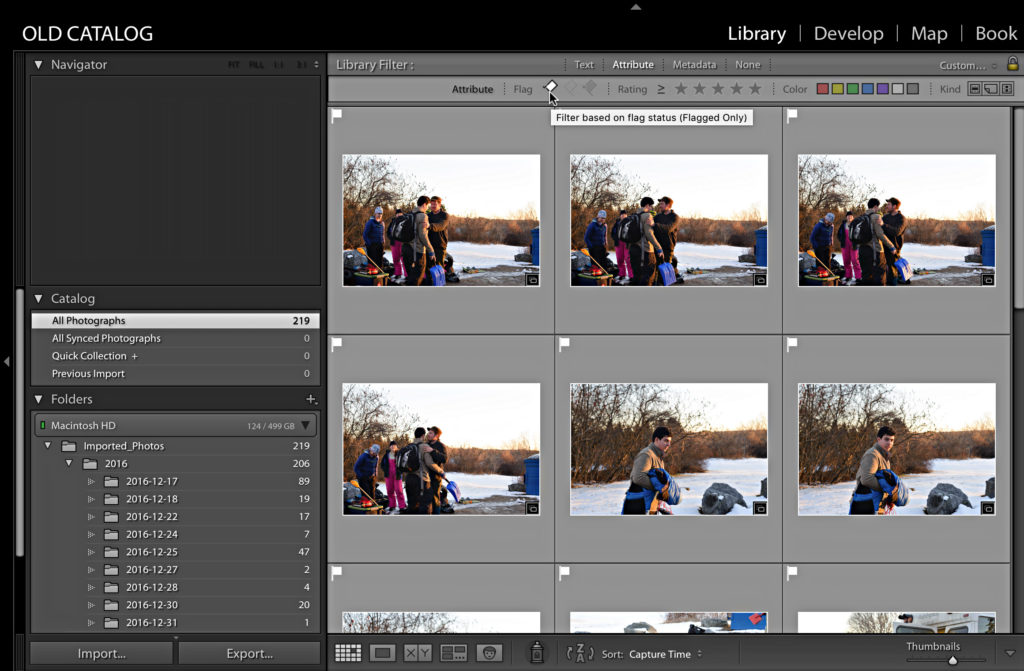
STEP THREE: Select all photos (Edit > Select All) and press the 1 key to apply a 1 Star Rating (or choose a rating level that works for your needs).
Now all the selected photos will have a Pick Flag and a Star Rating. Later, we’ll write from the catalog to each photo’s metadata and the Star Rating will be included.
Virtual Copies
One of the cool things about Virtual Copies is that you can save their settings as Snapshots, and Snapshots are available to the Master photo as well, and Snapshots can be written to XMP metadata. This means that you can take any Virtual Copy into Develop, click the plus sign on the Snapshots panel to create a Snapshot, and you will save the Lightroom settings of the Virtual Copy as a Snapshot. You’re probably thinking that would be a pretty tedious process to do with more than a few Virtual Copies, and you’d be right (but it would work, and can be done). Thankfully there is a third-party plug-in by a Lightroom user named Matt Dawson named Snapshotter that gives us the power to create Snapshots of all Virtual Copies with just a couple of clicks. The instructions for installing and using Snapshotter are available on the website, but here’s the basic steps once it is installed:
STEP ONE: Select All Photographs in the Catalog panel.
STEP TWO: Go to File > Plug-in Extras > Create Snapshot(s) from images.

STEP THREE: In the Snapshotter dialog box that appears, check the Virtual Copies Only? box so that Snapshots are only made for photos with Virtual Copies. Enter a name for the Snapshot (check the User Guide for more advanced naming options).
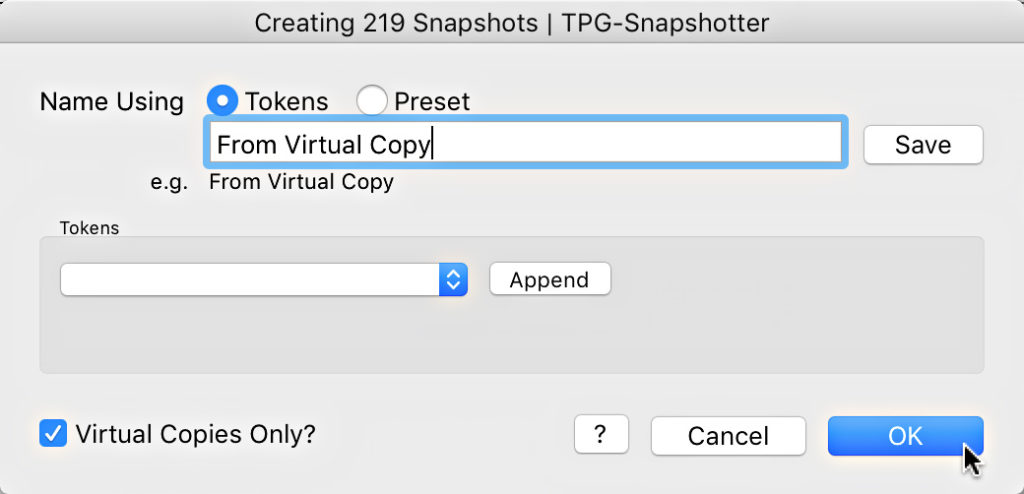
STEP FOUR: Click OK. The Snapshotter plug-in will create a Snapshot of the settings for each Virtual Copy.
Select a photo that has a virtual copy and press D to go to Develop and confirm the Snapshot is visible in the Snapshots panel. Pretty cool, eh?
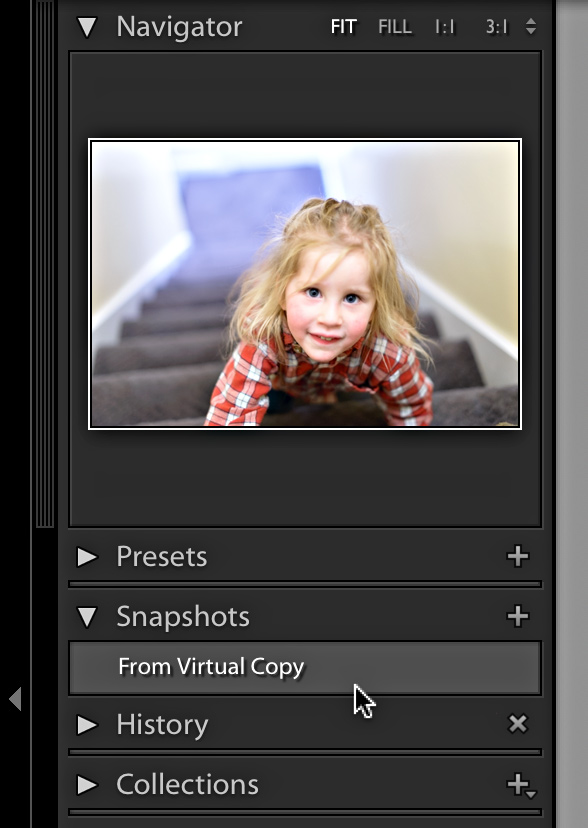
Later you can build a Smart Collection with the rule “Has Snapshots is True” to automatically gather up all photos with a snapshot. (Optional) To re-create a Virtual Copy in the new catalog, select a photo, go to Develop, create a Virtual Copy, then select the Snapshot to rebuild the Virtual Copy.
Next week we’ll wrap this up with how to deal with collections and keyword lists before trying to bring it all into a new catalog.

Assume one has backed up all the folders under Pictures to a WD My Passport. When one backs up those folders again at a later date is the backup disk going to recognize a change within a folder or only read the folder name and assume everything in the folder is still the same?
One would hope one would be using backup software that only backs up new files and changed files, and in which case the answer is yes, it will recognize a change. 🙂
Ok Rob, pretty much the answer I expected. I confirmed same by changing the contents of one folder and the change was not recognized.
Now, next question. How should I go about backing up my photos on an additional hard drive so any changes within a folder will be recognized.
I know that this backup subject has been beaten to death, but it is still confusing to a lot of folks besides my self.
Thanks, Dale
Hi Dale, You want to find software specifically for backup purposes that only backs up new and changed files. Vice Versa Pro is good for Windows, SuperDuper is good for Mac, but there are others that work well too.
Advice for making your new catalogue even more useful. I have a mixture of digital images and scanned in pictures from the past, including a large number of historic family images. I tried to keep the images in date related folders and added keywords. I have even gone through the scanned images and added gps data if known. Face recognition is amusing on a collection of historic family pictures, especially when you have childhood pictures of grandparents, followed by their adult images. But it was still hard to find some images. I have created collections that have made finding some things easier: collections by month, so that recurring events are easier to find. Particularly useful for flowering plants, all snowdrops in January/ February for example.
Real revelation came when I used Lightroom CC on an IPad to search for things I had not catalogued, but are easily identifiable by the Sensei search engine. I saved new albums on the IPad and synchronized them back to Lightroom Classic CC. Search for trees, Save to an album, then do a search within the album for fall colour. Search for flowers and then search the subset of images for roses, daffodils, etc. Or trains, buses, ships. Easily identify waterfalls, beaches, buildings, etc. Anything that has a distinctive shape or colour can be searched.There will be some false positives, but these are easily marked and dismissed. Back in Lightroom move these albums from the LR Mobile collection set so that they become normal collections. You can add keywords to these collections, so that the data is written back to the files.
As a former librarian and IT support for museum image databases I urge you to add as much information as possible when importing images to your catalogue, very few people ever retrospectively add keywords to any sort of database. Having enough information to answer who, what, where and why will make the images easier to find and more interesting to future generations.
Thanks, Helen!