The latest update to Lightroom, Lightroom Classic, and Adobe Camera Raw contained several groups of what are being called Premium Presets. The name simply means that these presets are only available to people with a paid Creative Cloud subscription, as opposed to the freemium option for Lightroom on mobile.
To be honest, I’ve never put the pre-installed presets that came with any version of Lightroom to much use, but I find these new sets to be pretty cool, interesting, and thoughtfully crafted. I came across a recent blog post from Ben Warde on the Lightroom team that provided some background on the various preset packs and the photographers who created them. Now I can see why these presets are a step above the rest. I even learned from that article that they also included some portrait presets for people using the freemium version of Lightroom that were created by my friend Aundre Larrow. Very cool!
Finding the Presets
Assuming you installed the June 2021 update, the new Premium Presets all appear right at the top of the Preset panel (Lightroom Classic 10.3 shown below, but these are accessible in ACR 13.3 and Lr 4.3 too), and are grouped into the following sets:
- Portraits: Deep Skin
- Portraits: Medium Skin
- Portraits: Light Skin
- Style: Cinematic
- Style: Futuristic
- Style: Vintage
- Subject: Travel
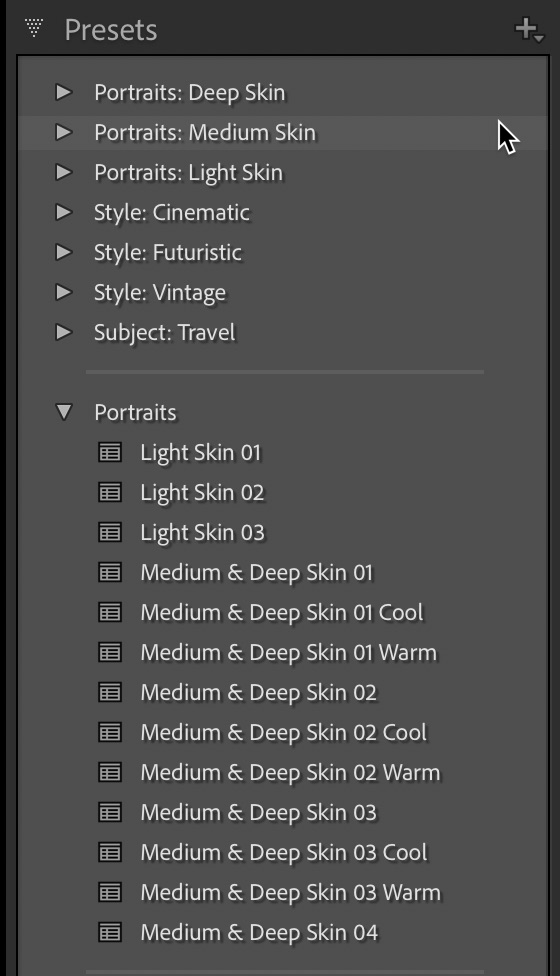
There are also additional free portrait presets under the Portraits group. The article about the new presets provides a bit of background on each group, but if you are not especially savvy about the differences in skin tones (like me), I found a number of good resources from the world of skin care that provide a good foundation for learning more.
If you don’t see the new presets, make sure you’ve got the .3 update installed for whichever LrC/Lr/ACR app you are using, and make sure you haven’t hidden them using the Manage Presets function in each application.
Presets as a Learning Tool
One of the aspects of presets, whether free or ones you purchase, is that they offer an opportunity to look over the shoulder of another photographer while they are editing. Obviously, there is no one preset that works equally well with all photos, but they can provide an insight into a new direction or new starting point for an edit that you may have not considered. When it comes to learning from presets, I find that Lightroom 4.3 for Mac/Windows (often referred to as “Lightroom Desktop” which I think is dumb as a differentiator to Lightroom Classic, but I digress) provides the best experience.
The reason this is my preferred tool for exploring presets is that not only do you get a live preview of the results of the preset by moving your cursor over the preset, but all of the settings activate in each panel as you do so! I really wish Lightroom Classic had that functionality.
Here’s what I do to learn from a preset:
Step One: Select a suitable photo that matches the type of preset you want to explore.
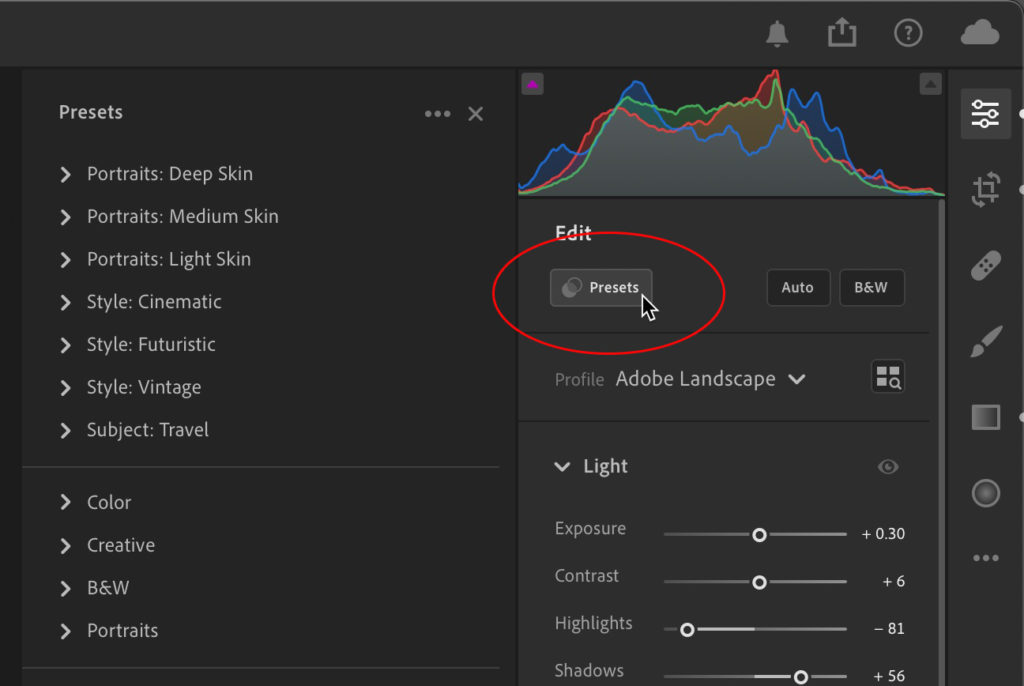
Step Two: Open the Presets panel by clicking the Presets button at the top of the Edit panels.
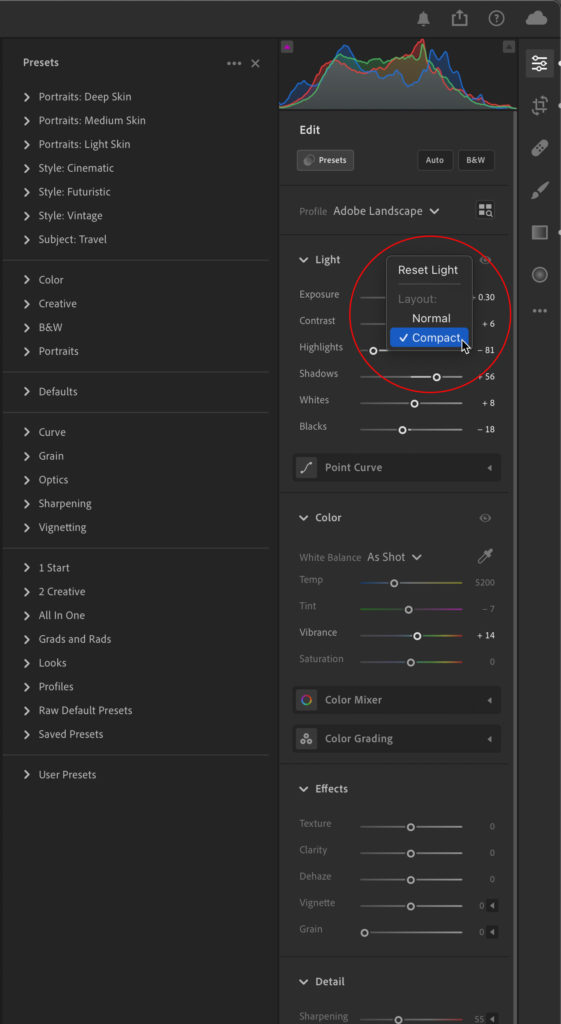
Step Three: Expand all of the editing panels to see their settings. You may want to disable Single-panel Mode (like Solo Mode) from the three-dot menu to be able to open all panels at once. You can also right-click one of the panel headers and choose to view them in Compact layout (instead of Normal) to see more at once. Depending the presets, you may be able to leave certain ones like Optics and Geometry closed if those settings are not likely included in the preset you are exploring.
Step Four: Expand the preset group you want to explore, and then move your cursor over the first preset. As you do this, notice the change in your photo and notice what sliders/settings change in the various panels (you may need to scroll up and down to analyze the changes in each panel).
Pay close attention to the nested panels for Point Curve, Color Mixer, and Color Grading, as many of the stylistic presets use settings in those panels. If a preset does contain a setting in one of those panels, and said panel is collapsed, you’ll see an eye icon appear on it as your cursor is over the preset. If that happens, click the panel to expand it, then place your cursor back over the preset to see what changes.
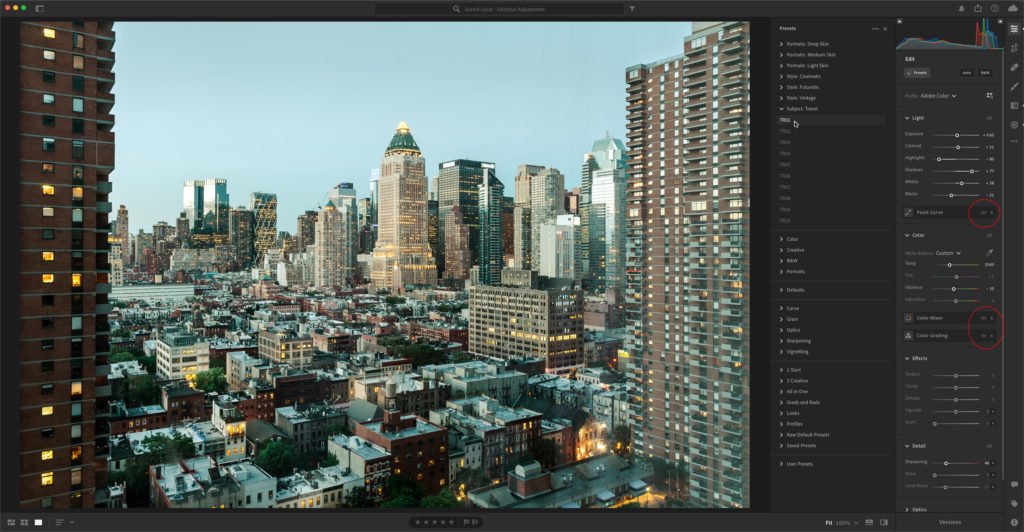
Because you see the settings change as you move your cursor you can use a photo with your own edits or an unedited photo to see what happens. As you find combinations of settings you like, see if you can begin to incorporate them into your own edits and see where it takes you. Thanks to all preset authors for sharing your vision with us, and thanks to Adobe for including them!


The annoying thing is that there are also look profiles also called Vintage 01 through 10, if you go to the profile browser. Yet, these are totally different from the 10 Style: Vintage presets. Why the redundancy? If they have to be redundant, why be inconsistent on top of that? They could have called the new presets “Retro” or something like that to avoid confusion.
Very Confusing – I spent 1.5 hours ‘looking’ for the presets/expanded with Adobe assuming it was Lightroom versus Camera Raw. I still don’t see the Preset Edit and selecting presets as shown in post.
Hi Bob, Did you install the June 2021 update? Which program did you look in (Lightroom Classic, Lightroom, or Camera Raw)? If you installed the update to LrC 10.3, Lr 4.3, and ACR 13.3, you will find the new premium presets in the Presets panel of each program.