
Understanding the Lightroom Classic to Photoshop Workflow
Understanding the basics of how to take your photos from Lightroom Classic (works the same in earlier versions of Lightroom Classic too) to Photoshop and back again (and possibly back and forth more than once) can reduce frustration and increase efficiency.
Configuring Preferences
Let’s take a look at the External Editing options, which can be found by going to Lightroom > Preferences > External Editing (PC: Edit > Preferences > External Editing).
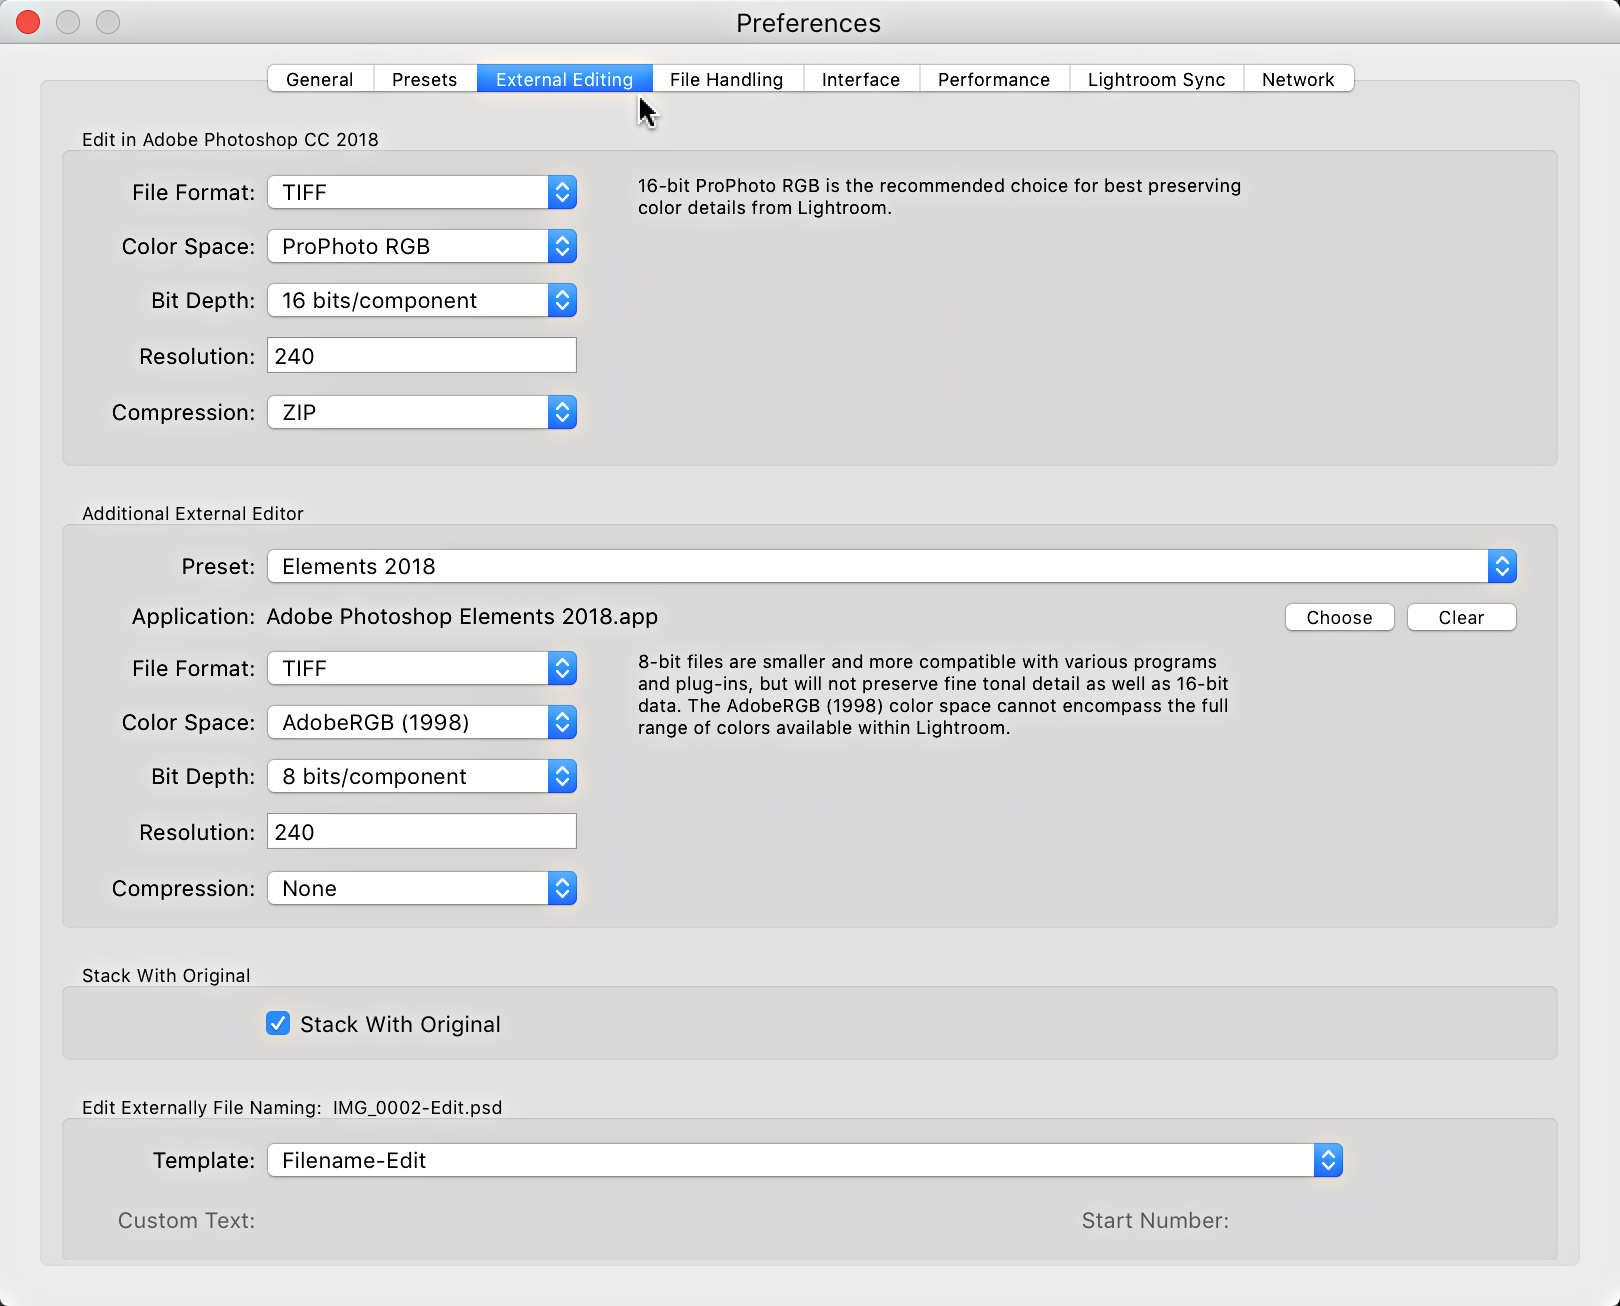
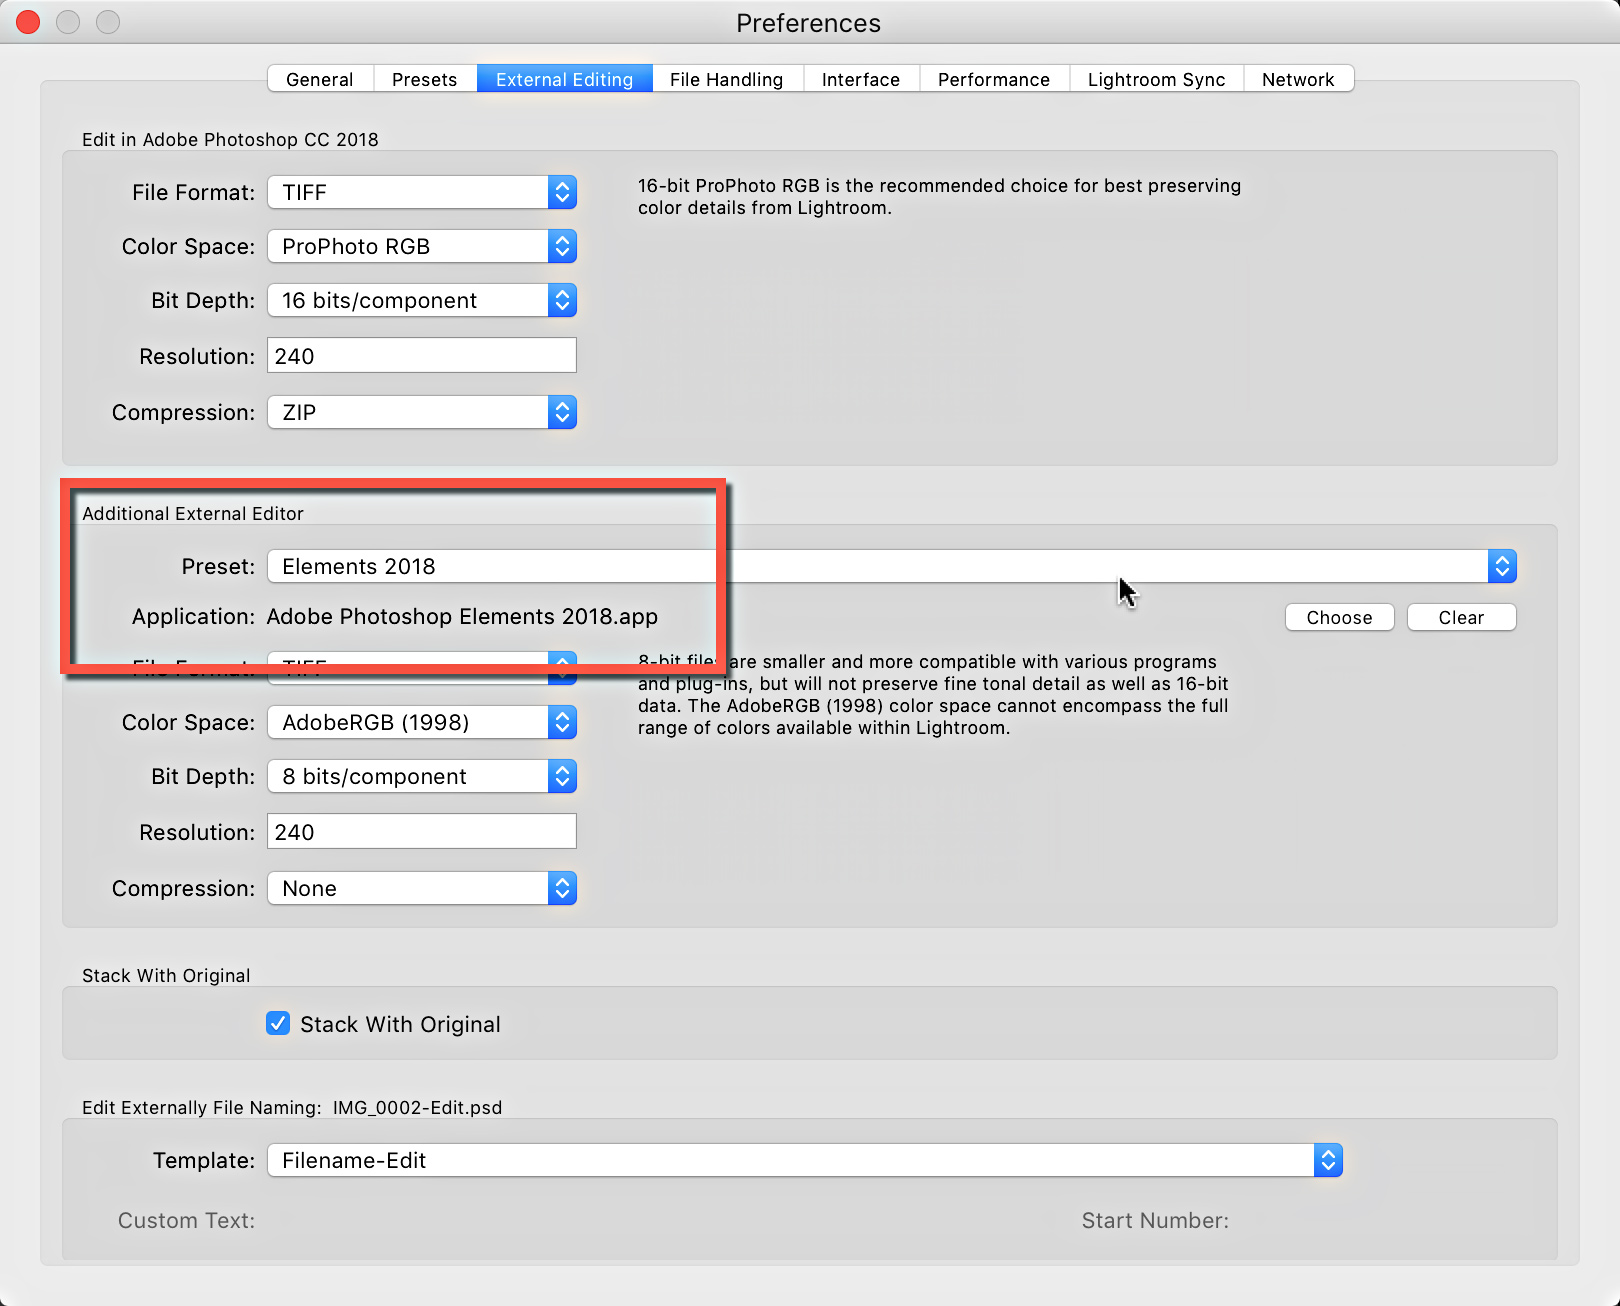
By default Lightroom will detect the most current version of Photoshop (or even Photoshop Elements) that you have installed (Photoshop trumps Photoshop Elements if you have both) and make that application the primary external editor, which is displayed at the top of the dialog box. You can optionally configure additional external editors in the Additional External Editor section.
Tip: After configuring an additional editor you can click the Preset drop-down menu and save those settings with that editor as a preset to easily reuse again in the future.
Regardless of whether you are using the primary external editor or an additional external editor you need to configure Lightroom to choose the File Format, Color Space, and Bit Depth of the copy that is sent to that editor. There is also a field for specifying the resolution value for the copy, but this has no effect on the pixel dimensions of the copy created, and it can be changed again at any time in the future based on your output needs, so simply choose a default value that you like at this stage. File type is also a personal preference, so choose TIF or PSD based on what you prefer, or just stick with the default setting. If you do go with PSD, make sure Photoshop’s File Handling preferences are set to always maximize PSD and PSB compatibility.

The biggest choice you need to make is around bit depth. If you shoot raw and want to have the most data available for editing in Photoshop then choose 16 bit. If you are satisfied with the amount of image data available in an 8 bit file, and prefer a smaller file size then choose 8 bit. If you go with 16 bit then ProPhoto RGB is the best choice for color space, but if you go with 8 bit then I would suggest using Adobe RGB (ProPhoto RGB is a wide gamut color space that is better suited to 16 bit data). Lightroom will then use these settings for all copies sent to the external editor.
At the very bottom of the External Editing dialog box is the place where you can customize the file naming convention applied to the copies sent to the external editor. By default the word Edit is simply appended to the existing file name. This works for me, so I just leave it as-is, but you can click the Template drop-down menu and choose an existing filename template or choose Edit to create a custom filename template that better suits your needs.
When?
One of the questions I get asked the most is about when in the workflow to send a photo from Lightroom to Photoshop. Well, if you are starting with a raw photo then it makes the most sense to do all your basic raw processing in Lightroom first (white balance, exposure, capture sharpening, lens corrections, etc.) and then send a copy with your Lightroom adjustments to Photoshop to do whatever work you need to do there. In this situation it is important to keep in mind that the copy that appears in Photoshop is not saved to your hard drive until you use the File > Save menu in Photoshop, so don’t be surprised if you still see the file extension of the original raw photo at first.
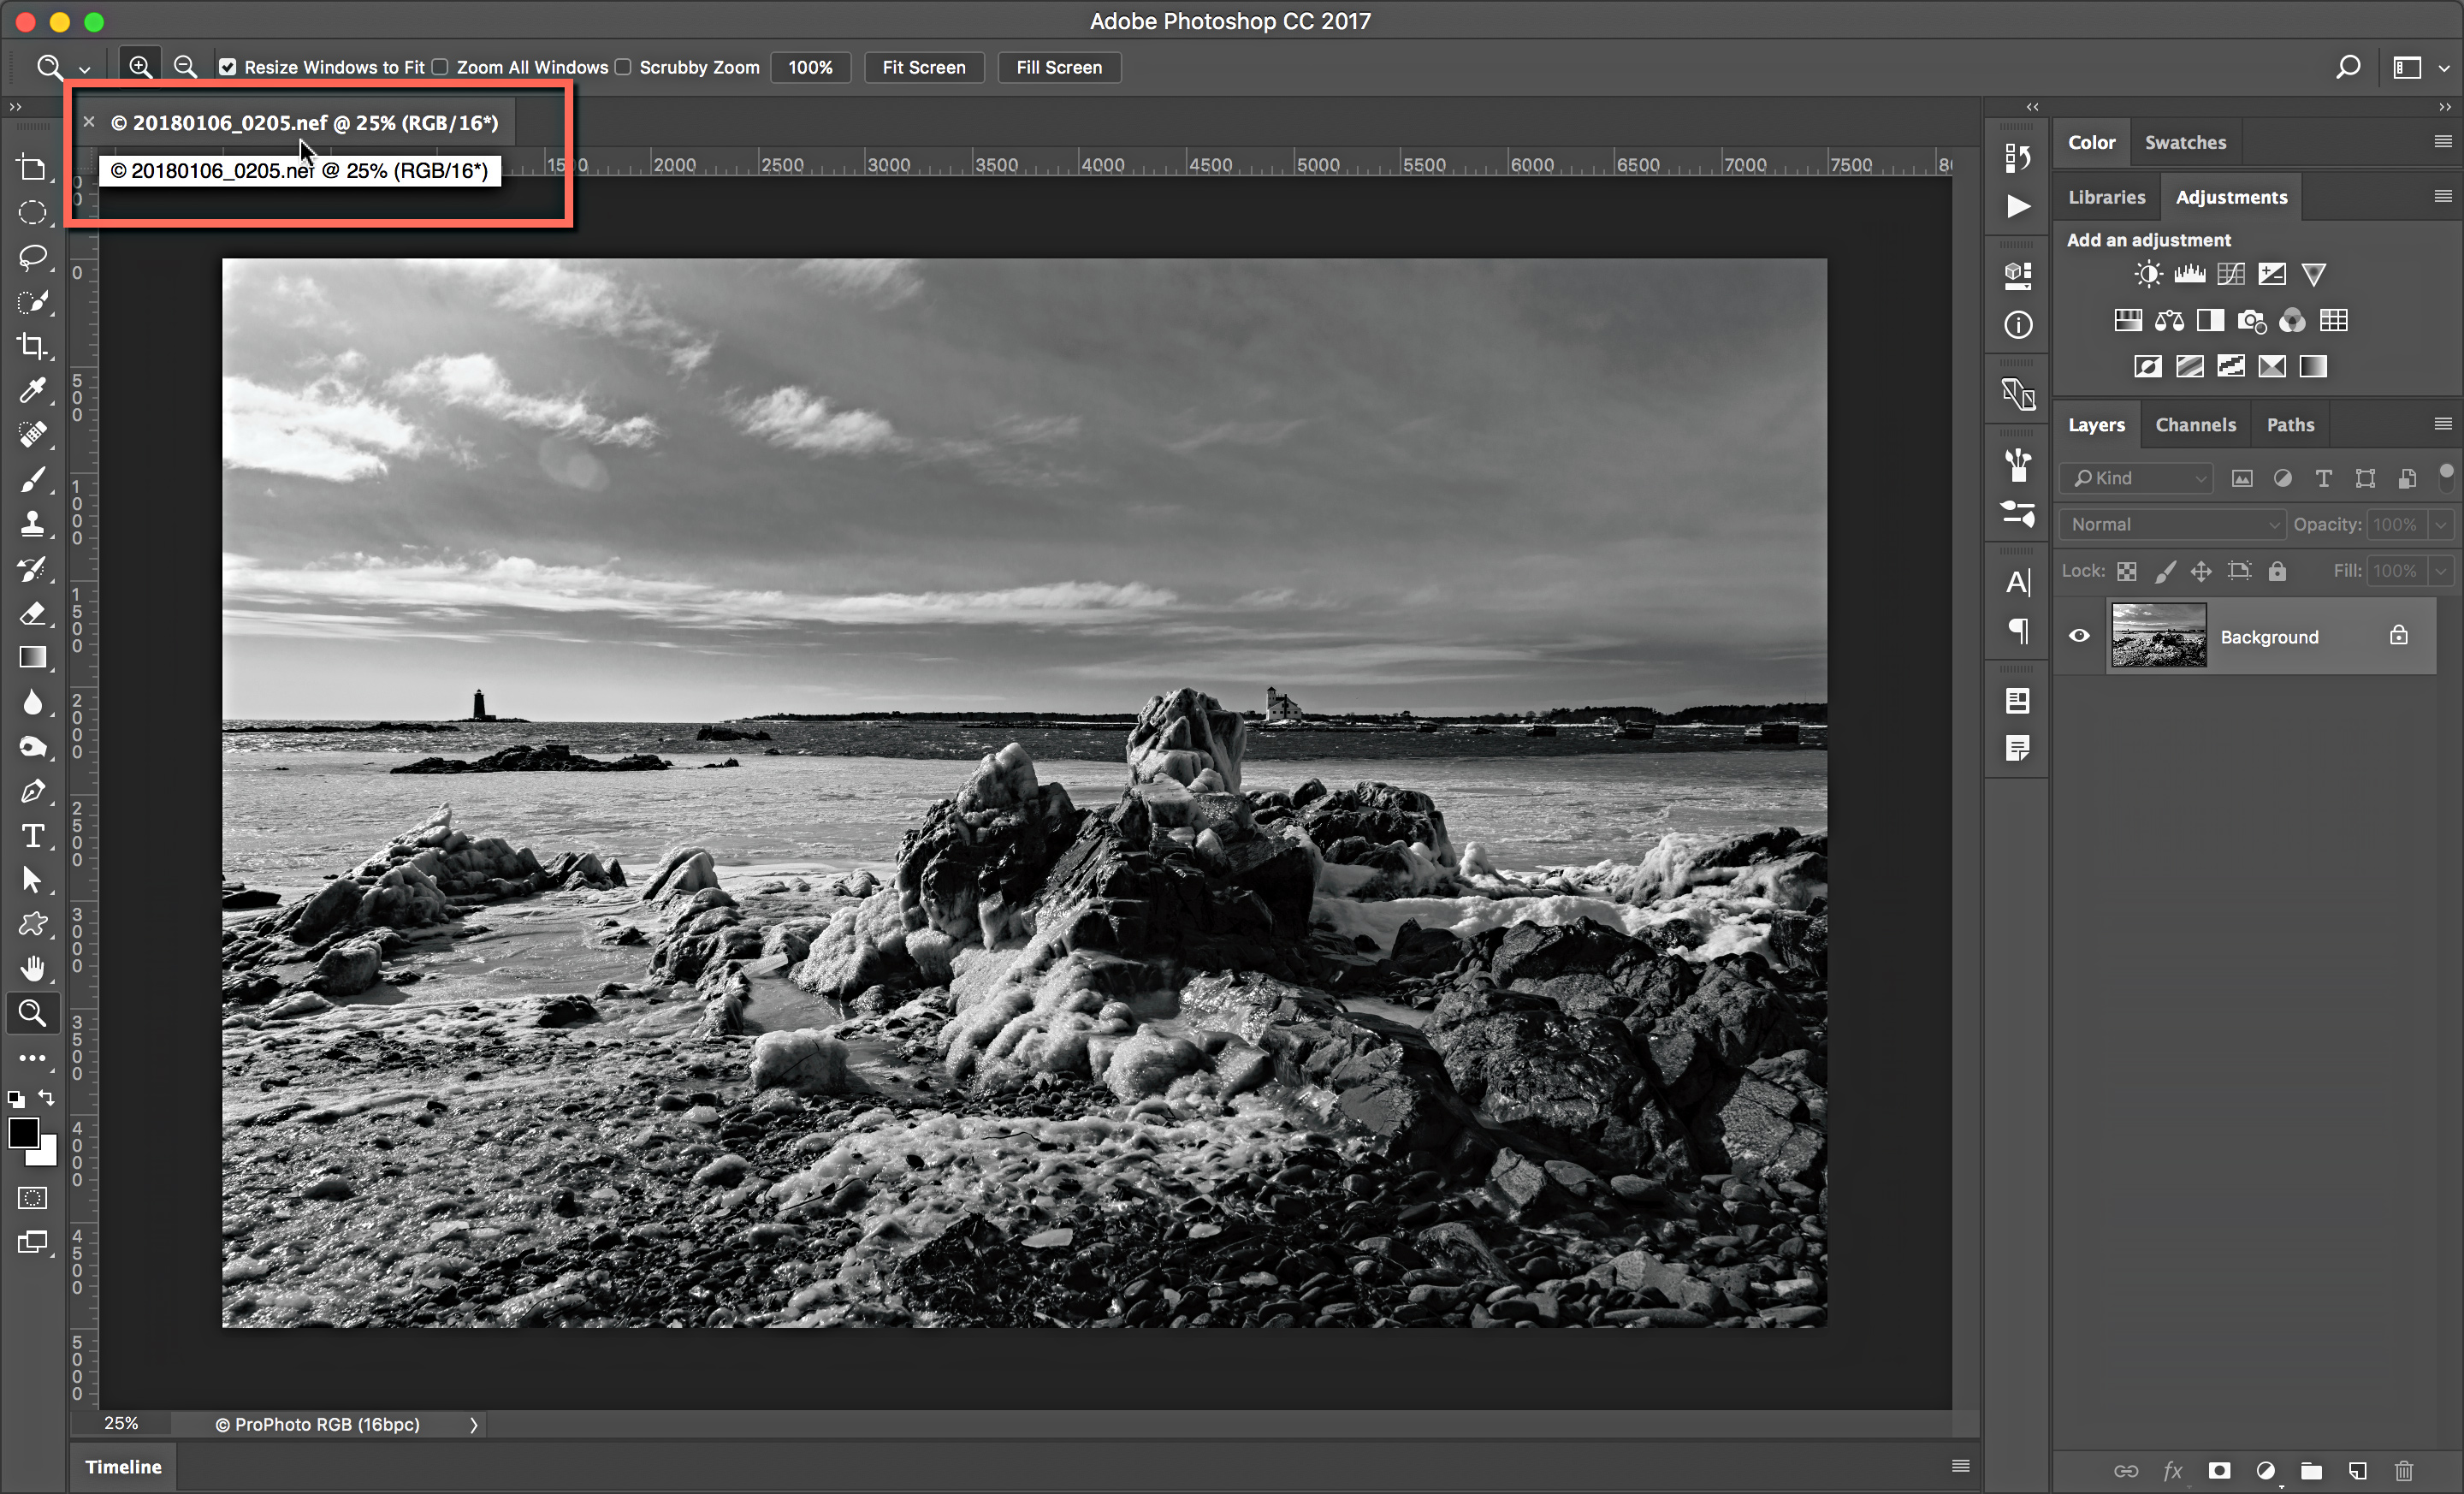
As soon you save the copy in Photoshop the file extension will update to reflect the file format and file name template you choose in Lightroom’s External Editing preferences, and at the same time the copy is saved to the same folder as the source photo and added to the Lightroom catalog.

Once you are done editing in Photoshop be sure to save one last time, then close the photo and switch back to Lightroom.
What about preserving layers?
Another frequent question I get is how to open a layered TIF or PSD file from Lightroom to Photoshop without flattening the image. If you select a non-raw photo (TIF, PSD or JPG) in Lightroom and go to Photo > Edit in > Edit in Photoshop then you will be prompted to make a choice.
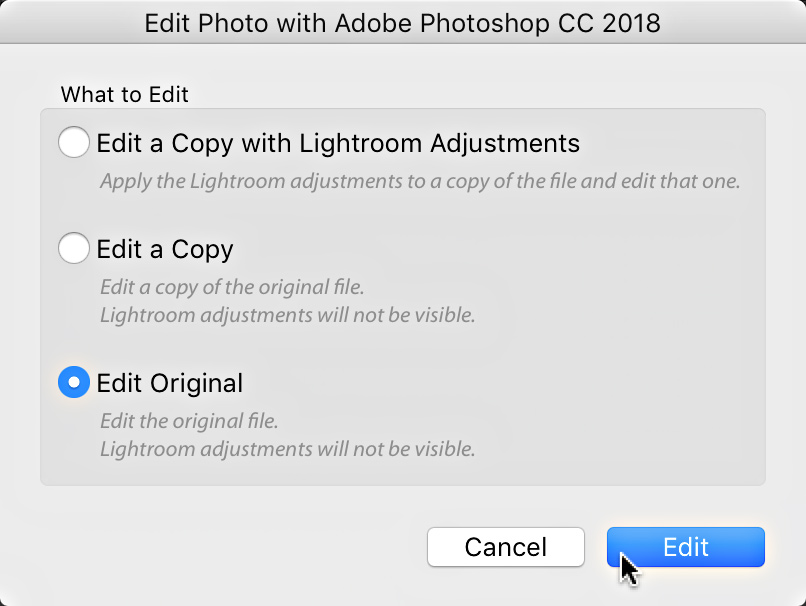
If you simply want to edit the original layered version in Photoshop without creating a new copy or applying any additional Lightroom adjustments then choose Edit Original. This would be the equivalent of opening that file from Bridge or Photoshop itself. Once you are done editing in Photoshop, just go to File > Save, then close the photo and return to Lightroom.
Lightroom can only ever apply its Develop adjustments to a new copy, and that copy will be flattened. For example, if you brought that layered photo into the Develop module and applied new adjustments to it, and then wanted to see the end result applied to a new copy that you could edit in Photoshop you would choose Edit a copy with Lightroom adjustments, which will result in a new flattened copy being sent to Photoshop. These are two different workflows with two different results, and the choice is yours.


[…] in a different file type, color space, pixel dimension, etc. then what was possible via the Edit in Photoshop workflow? Maybe you don’t really need to send a 16 Bit Prophoto RGB TIF to Photoshop just to do some minor […]
[…] in a different file type, color space, pixel dimension, etc. then what was possible via the Edit in Photoshop workflow? Maybe you don’t really need to send a 16 Bit Prophoto RGB TIF to Photoshop just to do some minor […]
[…] in a different file type, color space, pixel dimension, etc. then what was possible via the Edit in Photoshop workflow? Maybe you don’t really need to send a 16 Bit Prophoto RGB TIF to Photoshop just to do some […]
Rob good advice…. thanks I do have a question, This just happened and not sure why? went to edit as normal From LR to PS, expecting to see the normal window Edit copy w LR adjustments
Edit copy
edit original
(Same window as above) The window did not appear, went directly to PS. Made edit, hit save, opened LR, the edit was there with the corrections. So my question where did that window go? What am I missing? I repeated several times.same outcome,(current LR,PS, windows ) Thanks
You only see the dialog when you have a non-raw photo selected in Lightroom. It sounds like you were working on a raw photo.
Thanks for addressing a frustrating issue in each of the LR series I’ve used. — JA
I have the same question. I no longer get the 3 options in LR when I select EDIT IN. Instead PS launches. I called Adobe and they said it was always that way. Uh uh. It changed.
Well it depends on the file type you have selected in Lightroom when you choose the Edit in Photoshop command. If you have a raw photo selected, then Photoshop simply launches and the copy appears in Photoshop, no prompts from Lightroom (and it has been this way for a decade). However, if you start with a non-raw photo (JPG, PSD, TIF, PNG) then you will get a prompt because you have to choose if you want to edit a copy with Lightroom adjustments or simply open the original non-raw photo to continue editing.
[…] post Understanding the Lightroom Classic to Photoshop Workflow appeared first on Lightroom Killer […]
Why would you use Edit as a Smart Object coming from LR?
Here’s a video that answers that question: https://lightroomkillertips.com/advantage-opening-lightroom-image-photoshop-smart-object/
What is the advantage of using ‘zip’ in the external setting for Photoshop?
It uses lossless compression to make file size smaller. There is a tradeoff in that compressed TIFs can take longer to open and save.
Hi Rob,
Good Article! One question. I normally use PSD for saving back from PS to LR to keep the layers. Is there an advantage to using Tiff with zip for compression? Also, what do you recommend doing with all the Tiff or PSD files that are produced going back and forth once you’re satisfied with the photo? Do you delete them or keep them in your original file?
Thanks for all your help!
Dennis
The advantage to using Zip compression with TIF files is that it will compress the file (lossless) and result in a smaller file size than uncompressed. However, there is a tradeoff in that compressed zips can take longer to open and save/close. Everything is a tradeoff, so you need to decide what is best for your needs. That said, if you end up with files with lots of layers PSD will probably result in a smaller file size than TIF.
If I start in Lr with a raw photo, edit, then send a copy with adjustments to Ps, that copy becomes my new master version (has both Lr and Ps edits), so I keep it. I also keep the raw original.
Hi Rob, Maybe you can help me with an issue I have been stuck on for over a month now… when I go and edit my file in photoshop the file does not automatically land back into LR. It used to, but I have to perform a “save as” even if I only hit save, it brings up the save as command, then I have to import the edit from inside LR my setting look all the same as what you have shown here, . Any thoughts on this post is a bit old. I did an update to CC on LR and PS and It seems like that is when this behaviour changed on me
Any help is appreciated very much
Hi Bill, Can you do a test? Select a folder in the Folders panel with a few raw photos in it. Select one of those photos and use the Photo > Edit in > Edit in Photoshop menu. When the photo opens in Photoshop, grab the Brush tool and paints a big X across the photo (to make it easy to see the edit vs the original), then go to File > Save. What happens exactly after that?